Ultimate Guide: Installing & Optimizing Proxmox VE
Prepared By: Lâm Trịnh Chí Tài (Gyn)
From bare metal to a fully optimized virtualization host in 15 minutes.
1. Prerequisites
Before we begin, ensure you have the Proxmox VE ISO downloaded. Mount the ISO to a USB drive using tools like Rufus or Ventoy, plug it into your server, and boot from USB.
2. Core Installation Steps
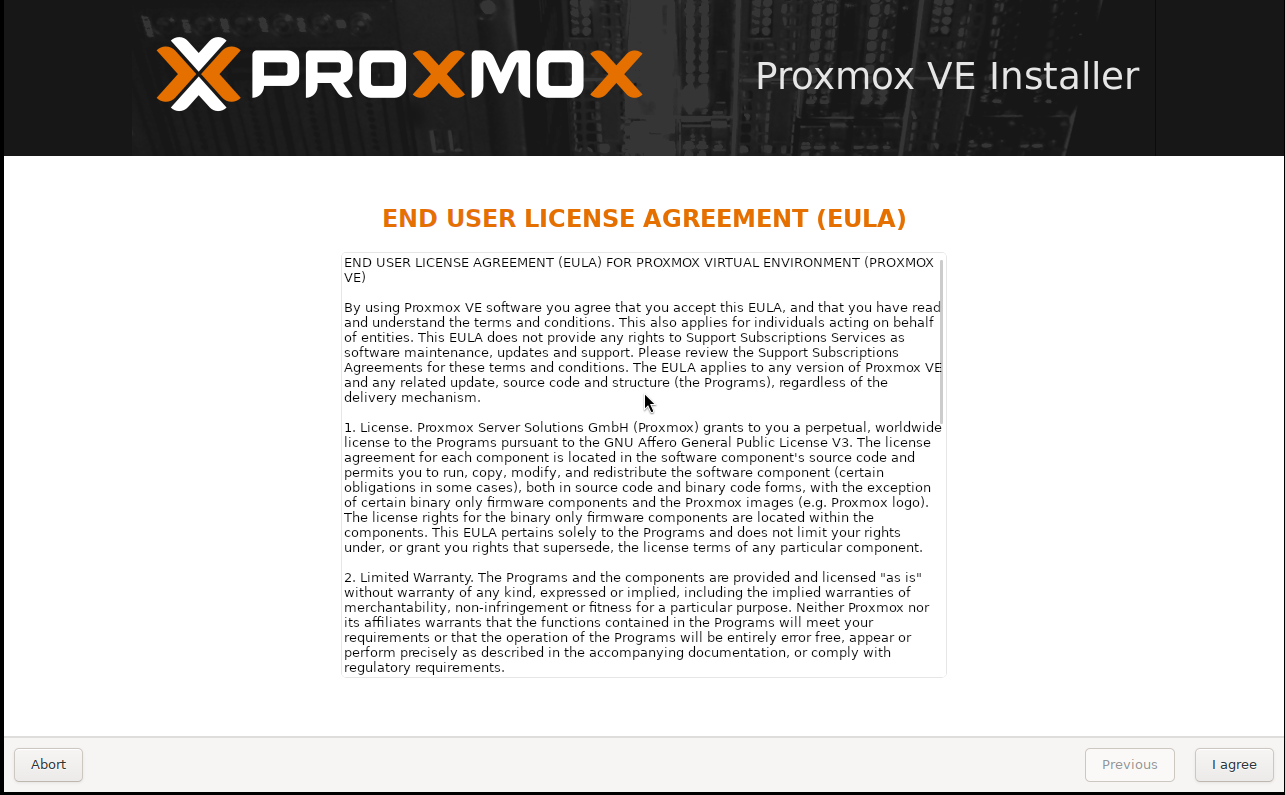
Step 1: License Agreement. At the EULA screen, simple click "I Agree" to proceed.
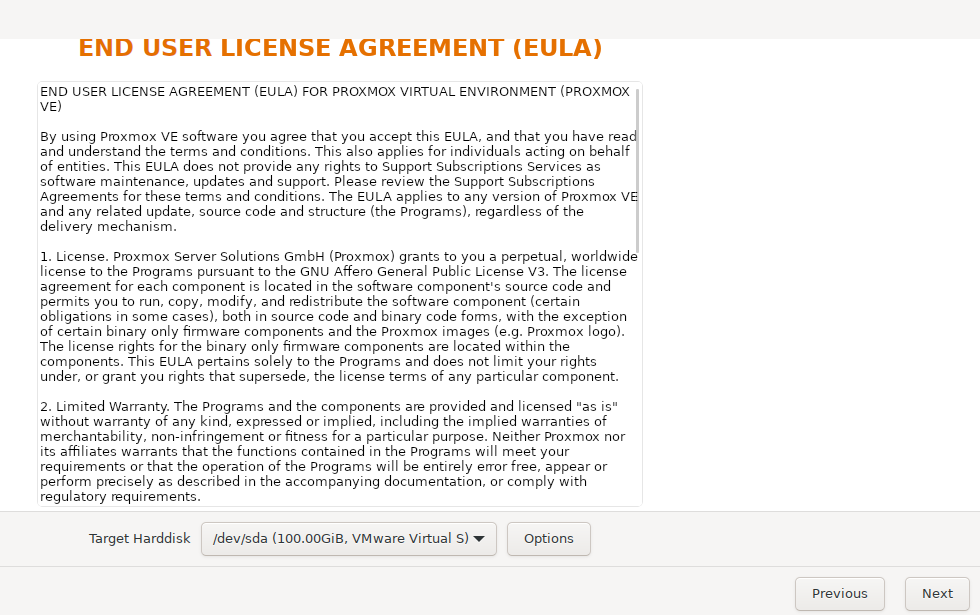
Step 2: Target Disk. Select the physical hard drive where you want Proxmox installed. If you have multiple drives, use the dropdown menu to select the correct one.
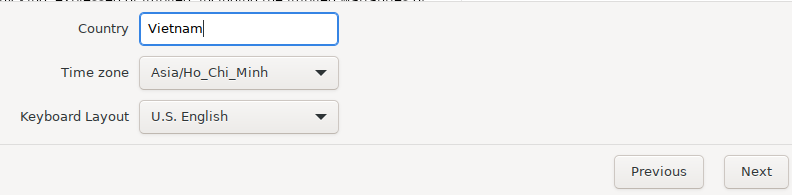
Step 3: Localization. Set your Country, Time Zone, and Keyboard Layout.
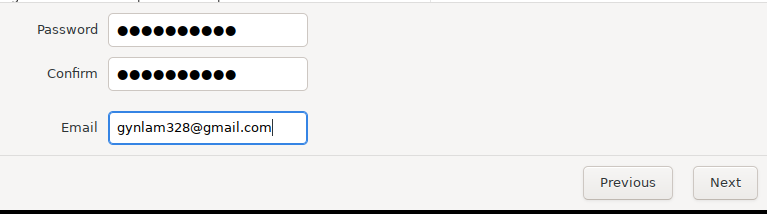
Step 4: Credentials. Set a strong password for the root account and provide a valid email address for system notifications.
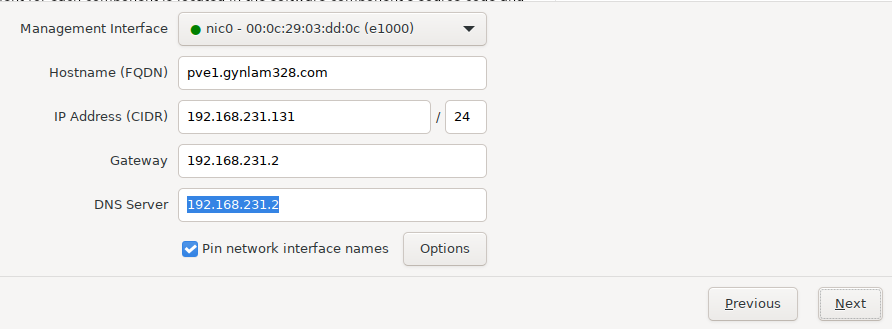
Step 5: Network Configuration. Assign a Hostname (FQDN) and set a Static IP. This IP will be your gateway to the Web GUI later.
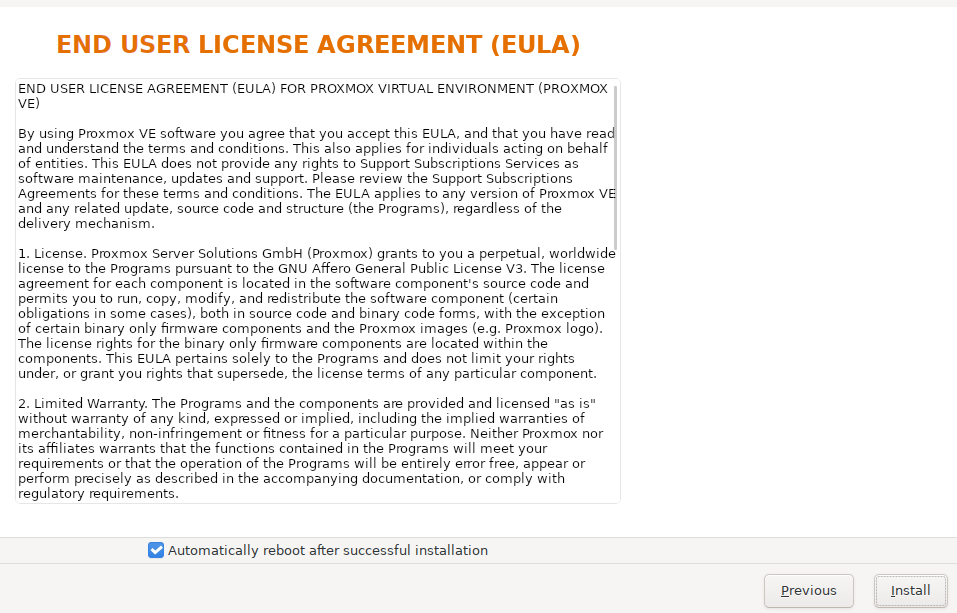
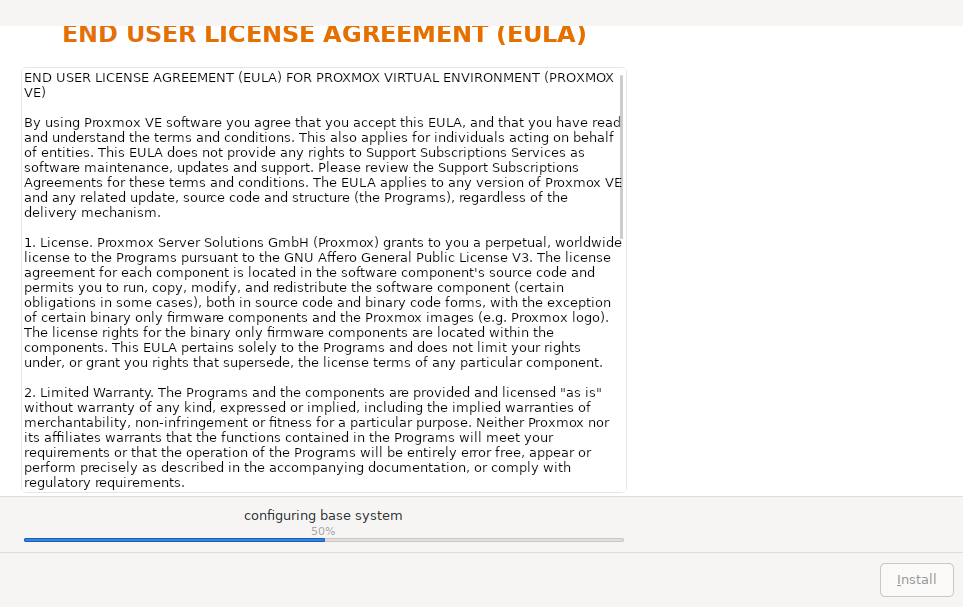
Step 6: Finalize. Review your settings. Make sure to check "Automatically reboot after successful installation" and click Install.
3. First Login
After the server reboots, you will see a CLI login screen displaying your management URL.
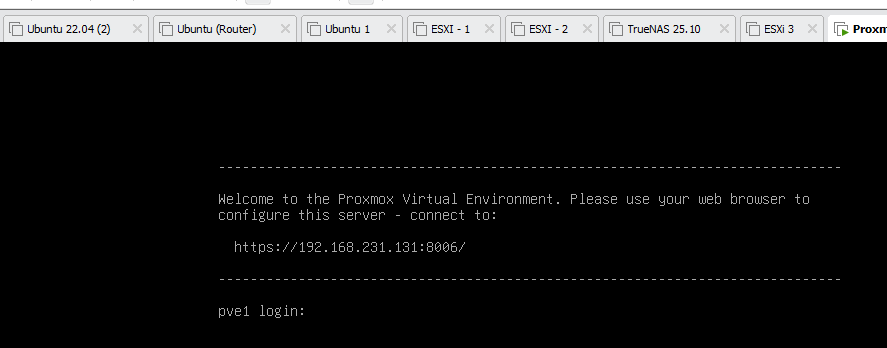
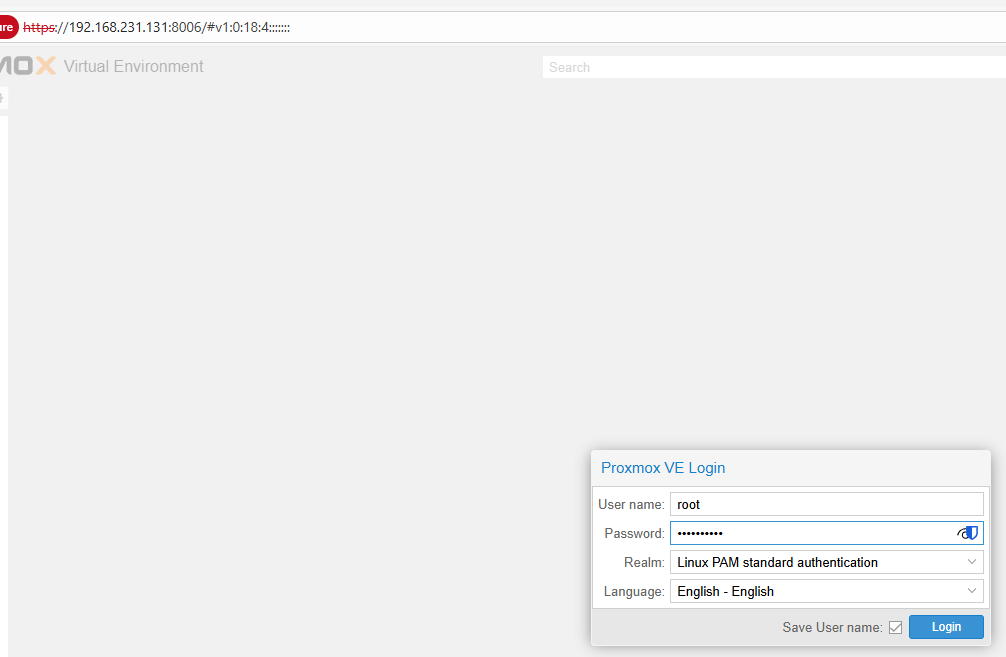
Open your web browser and navigate to https://YOUR-IP:8006. Login using:
- Username: root
- Password: (The one you set earlier)
4. Pro Tip: Merge Partitions (Storage Optimization)
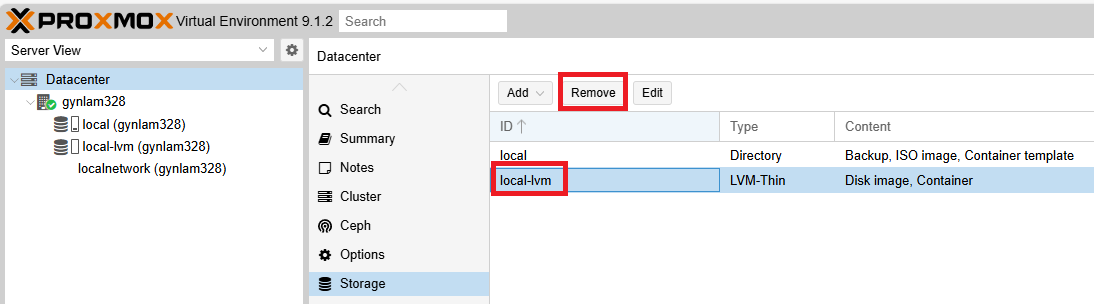
Step A: Remove local-lvm
Navigate to Datacenter > Storage. Select local-lvm and click Remove.
Step B: CLI Operations
Open the Shell from the top-right corner of the node view.

Run the following commands in order:
1. Remove the logical volume:
lvremove /dev/pve/data
(Type 'y' and Enter to confirm)

2. Resize the root volume to use all available space:
lvresize -l +100%FREE /dev/pve/root

3. Resize the filesystem to match the new volume size:
resize2fs /dev/mapper/pve-root

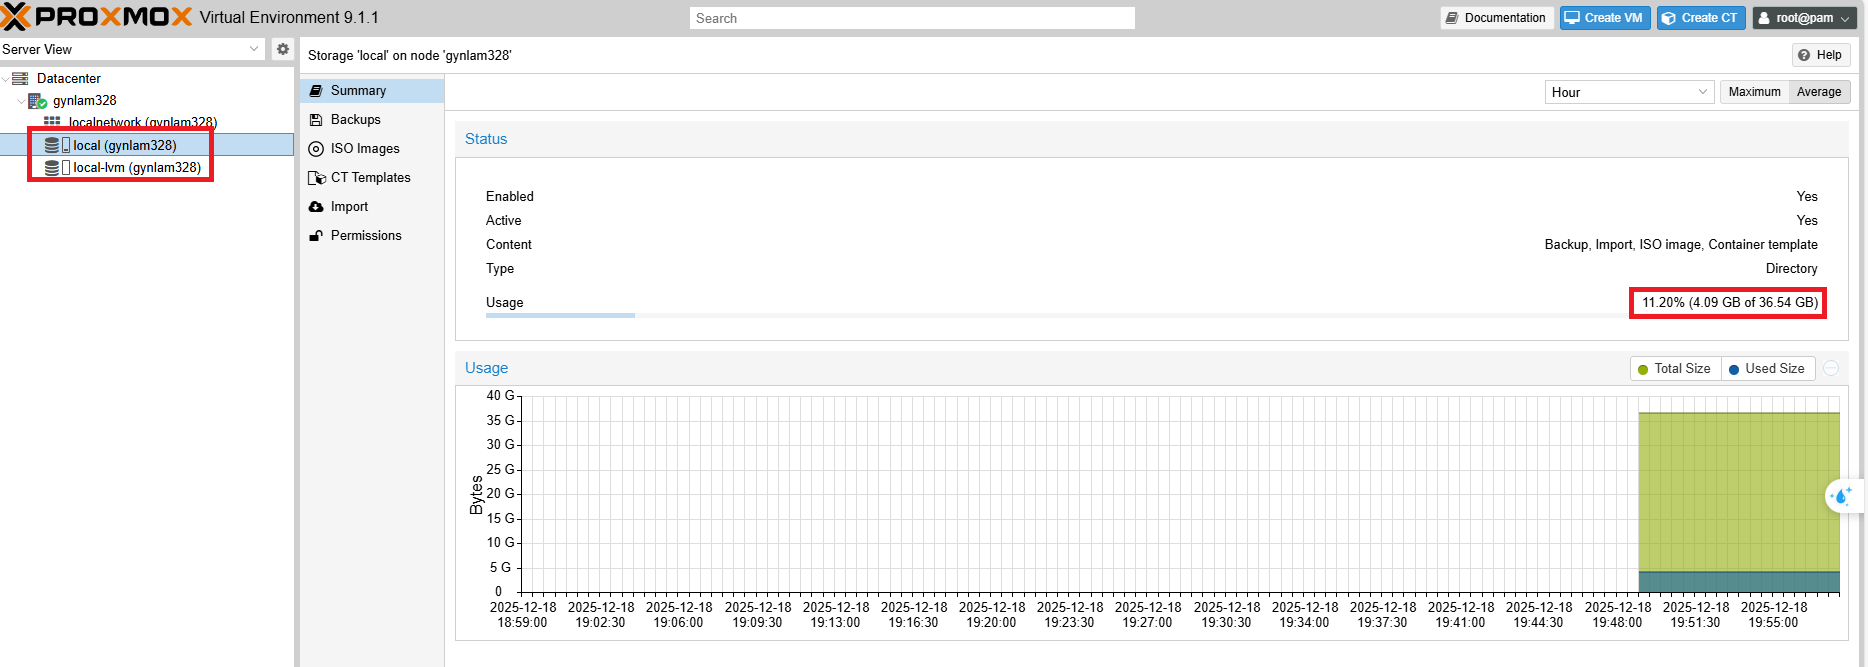
Step C: Verify Changes
Check your storage summary. You should now see a significant increase in the local storage capacity.
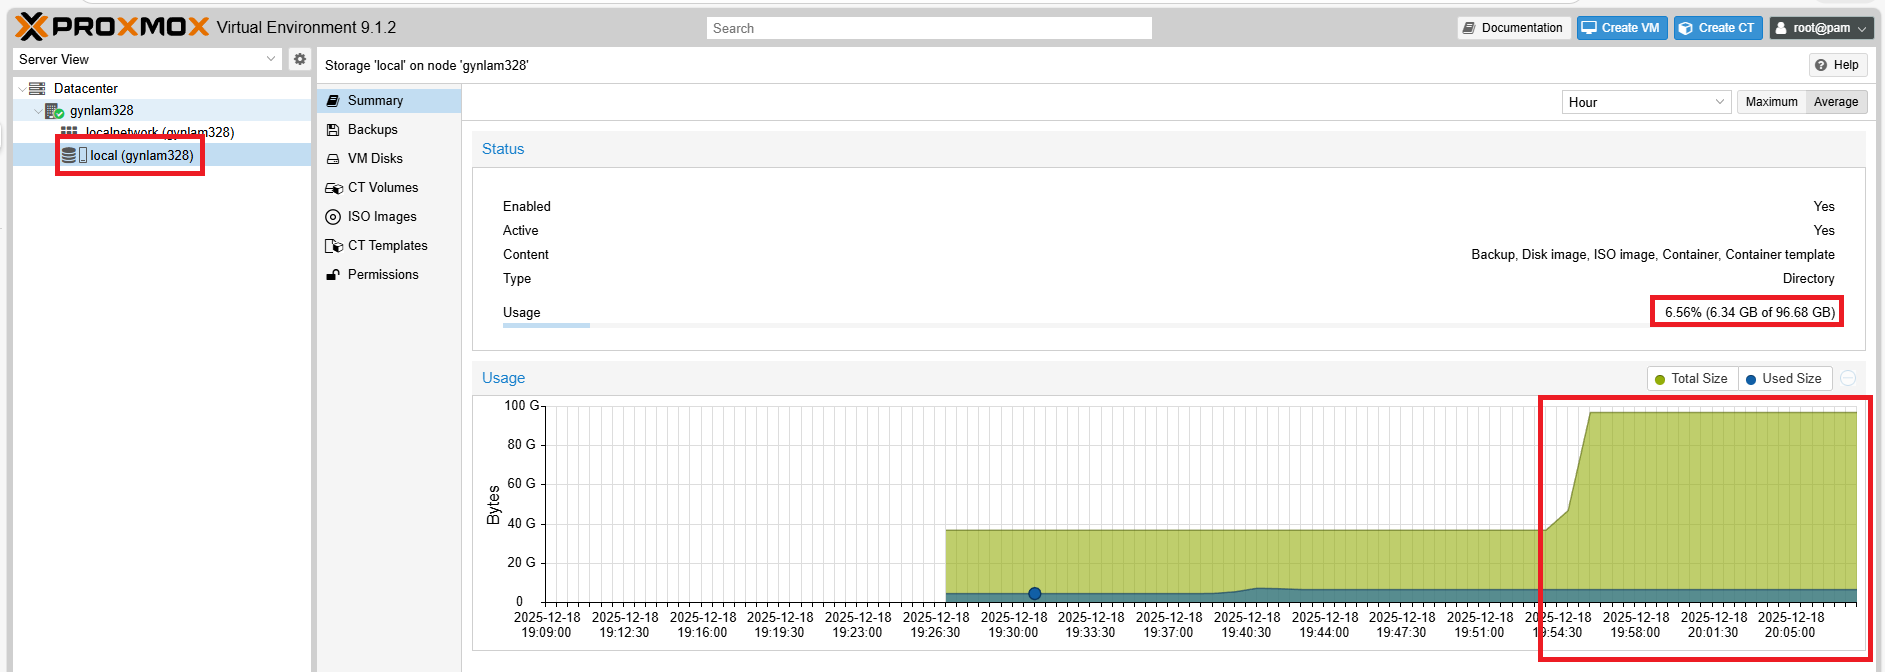
Step D: Reconfigure 'local' Storage
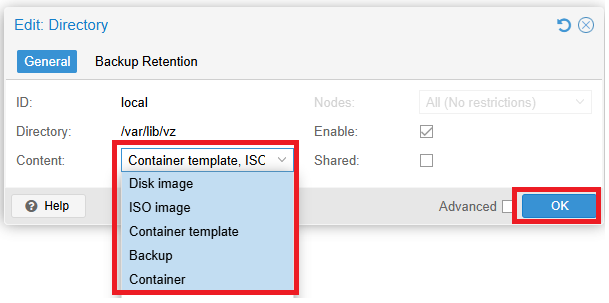
Go to Datacenter > Storage, select local and click Edit.

Under Content, ensure all types are selected (Disk image, ISO image, Container template, etc.) so you can store everything here.
5. Resource Management
Uploading ISO Images
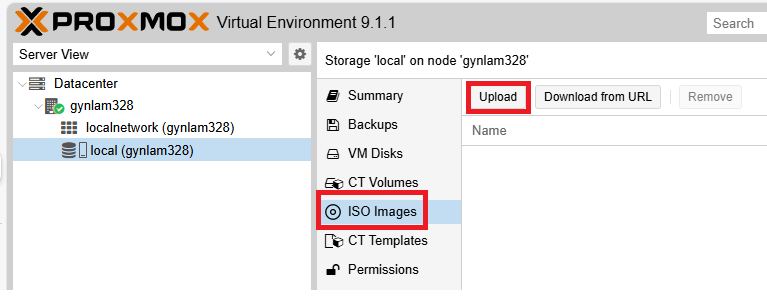
To create VMs, you need ISO files (like Windows or Linux installers). Go to local > ISO Images > Upload.
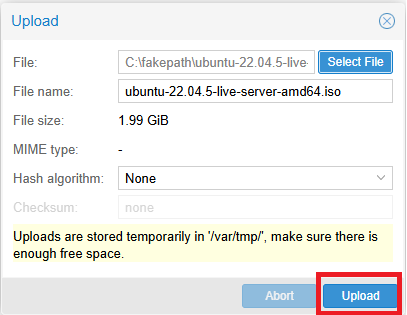
Select your downloaded ISO file from your computer and upload it.
Downloading Container Templates (LXC)
For lightweight containers, use templates. Go to local > CT Templates > Templates.
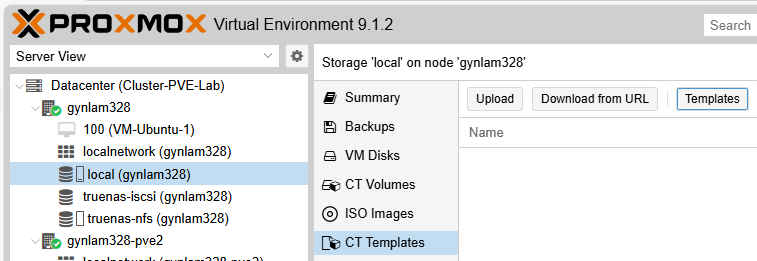
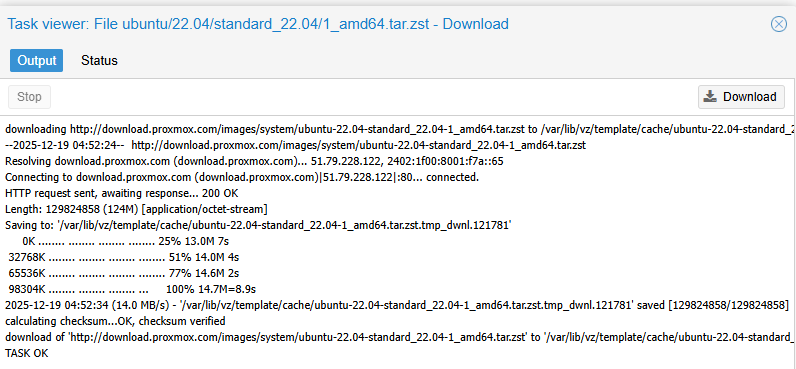
Search for a template (e.g., "ubuntu") and click Download.
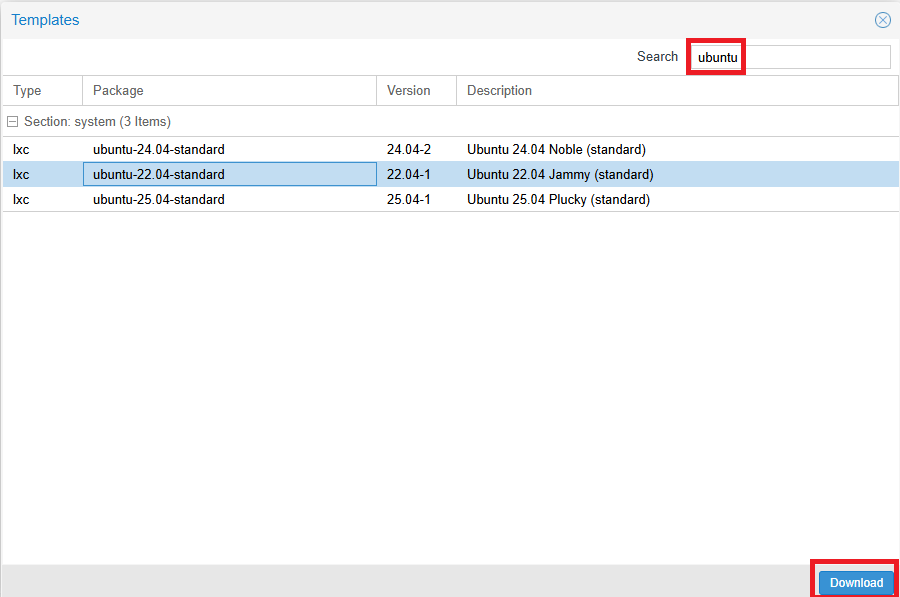
Wait for the "TASK OK" message.