System Virtualization
How to Set Up vMotion and High Availability (HA) in VMware vCenter
A step-by-step guide to ensuring enterprise virtualization reliability through live migration and automatic failover in a VMware vCenter environment.
Accessing the vCenter Server Environment
Open your browser and navigate to the vCenter Server IP address to begin managing your virtualization infrastructure.
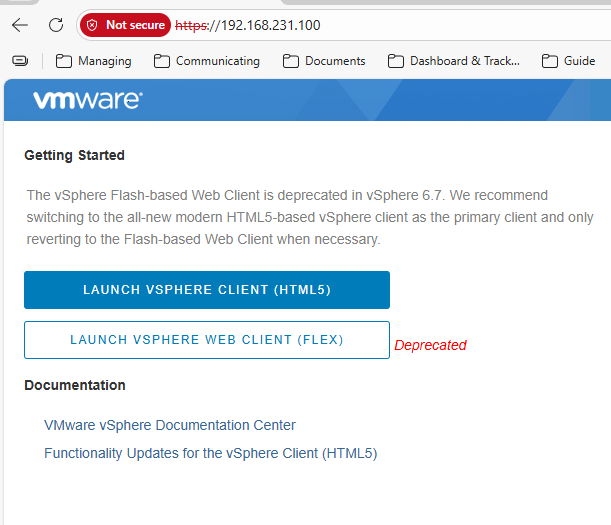
Open a web browser and navigate to the server's IP address.
Note: Always select LAUNCH VSPHERE CLIENT (HTML5). The older Flash-based web client is deprecated and no longer supported.
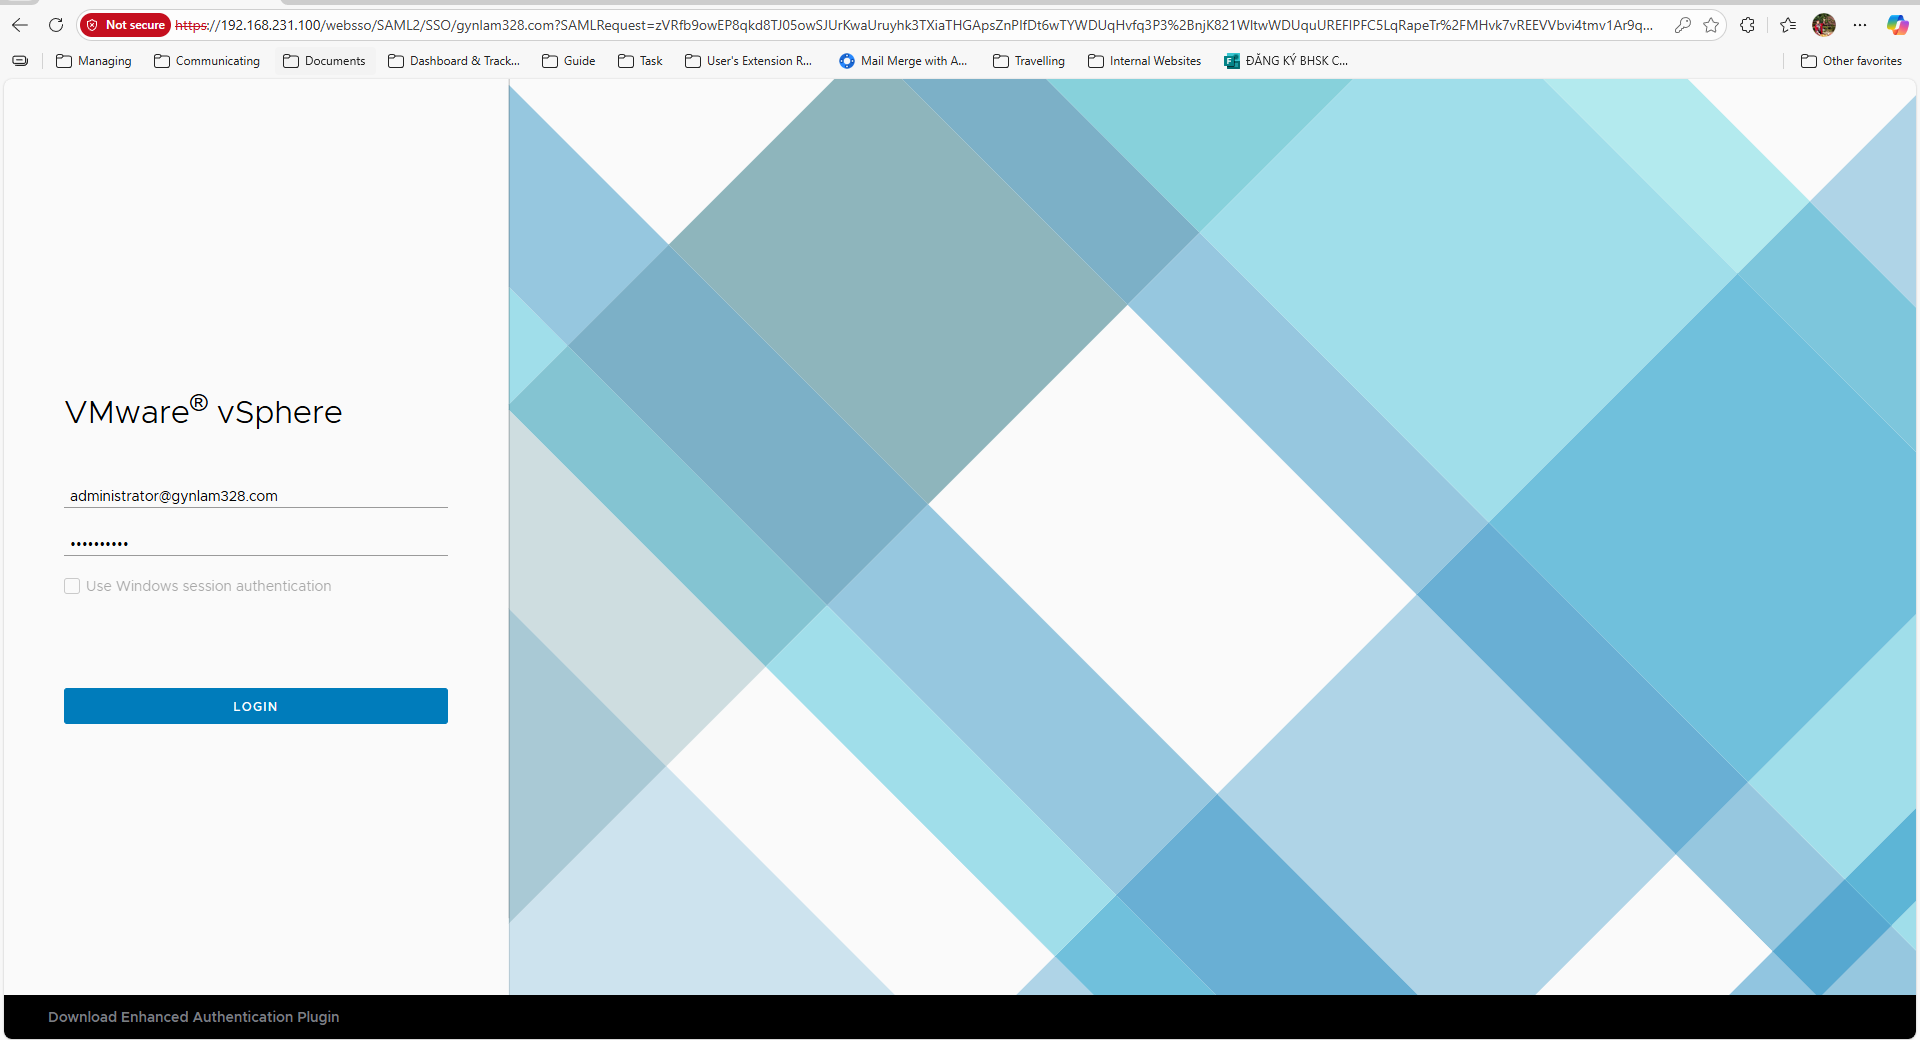
Login Credentials
- Username: administrator@domain (e.g., administrator@gynlam328.com)
- Password: Use the secure password defined during your initial setup
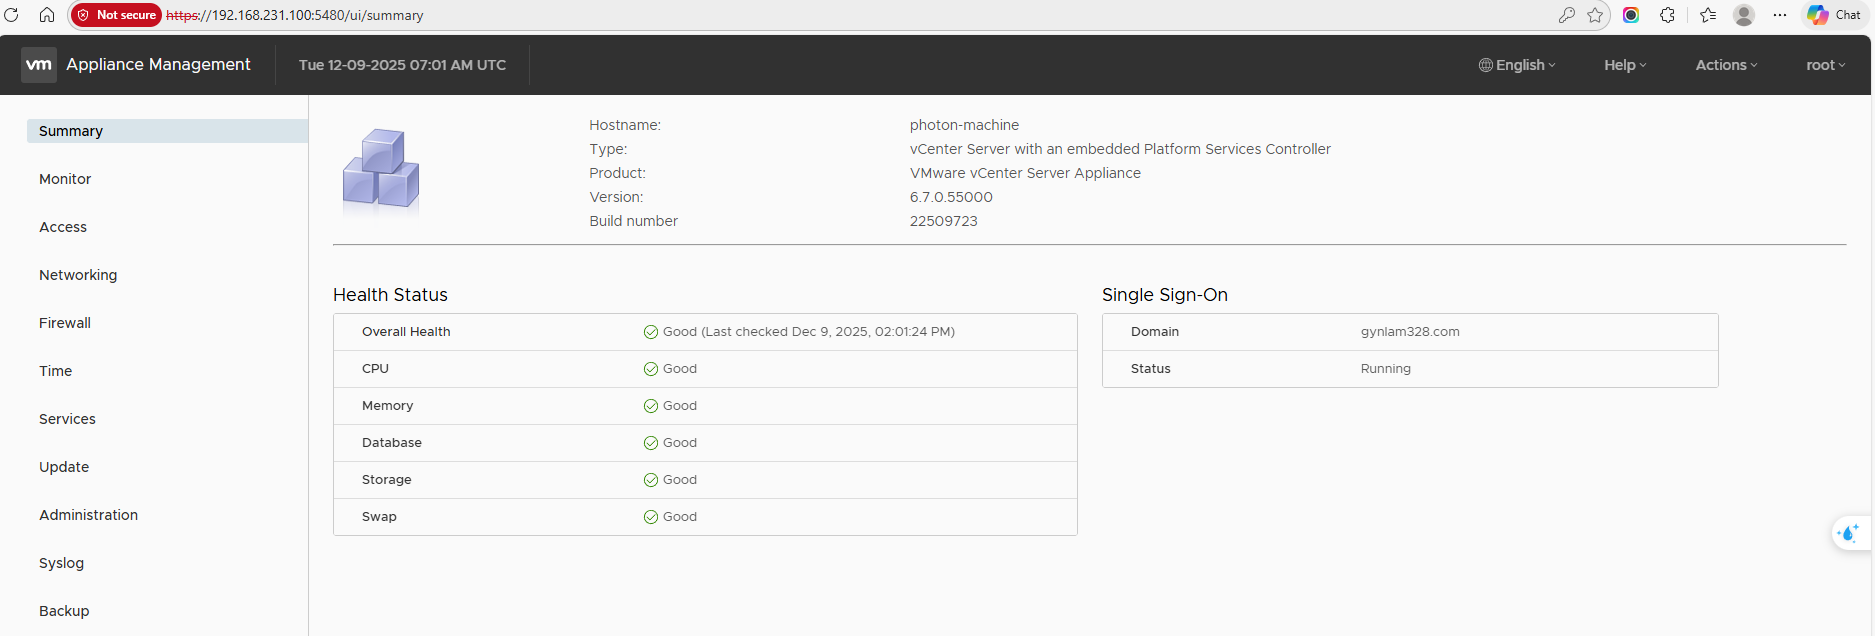
Pro Tip: For backend management, access the
Appliance Management Interface (VAMI) via
https://[vCenter-IP]:5480. Log in with the root account to monitor
system logs, restart core services, and perform health checks on CPU, memory, and storage.
Building the Virtual Infrastructure
Create and configure the Datacenter, Cluster, and ESXi Hosts that form the foundation of your virtualization environment.
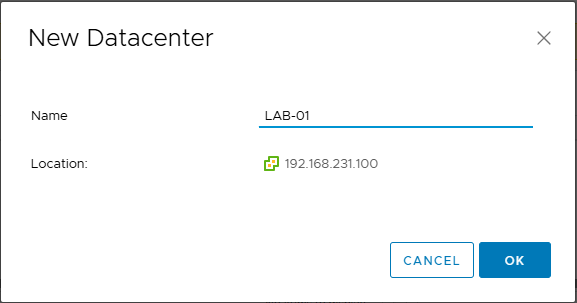
Step A: Create a vSphere Datacenter
The Datacenter is the top-level logical container used to centrally manage all your ESXi nodes. In a real-world business scenario, this typically represents a physical office location or branch (e.g., PROD-UK01, LAB-01).
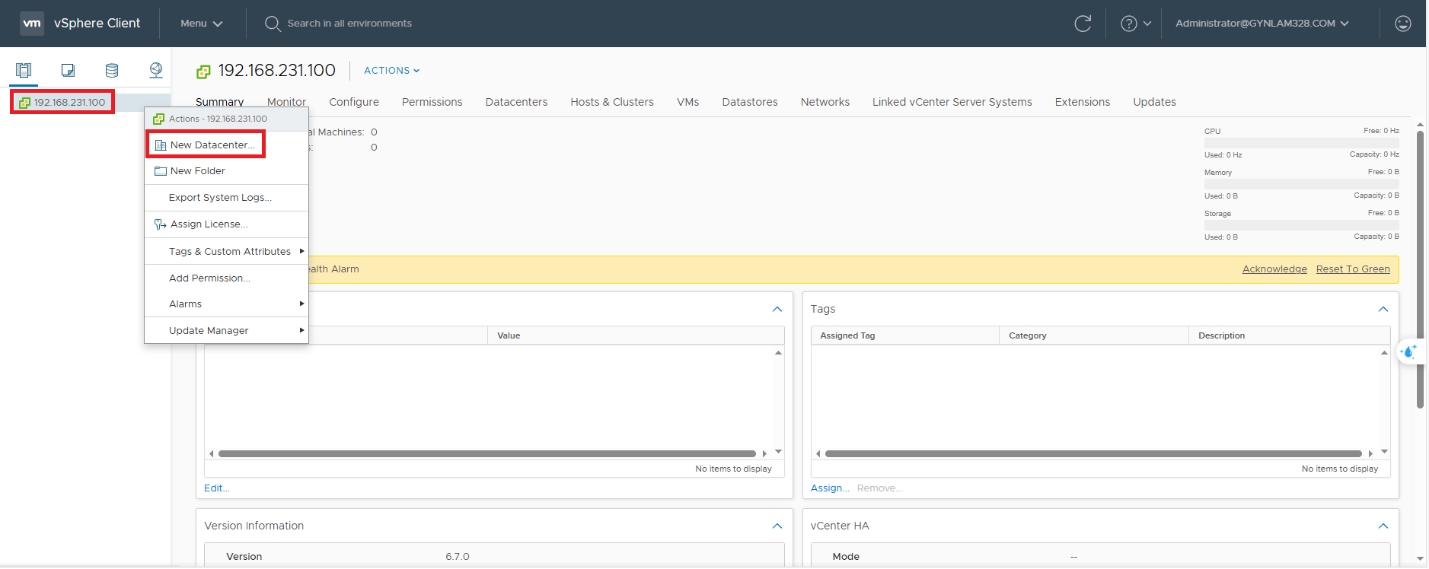
- Right-click your main vCenter instance and select New Datacenter.
- Provide a descriptive name (e.g.,
LAB-01).
Step B: Create and Configure the ESXi Cluster
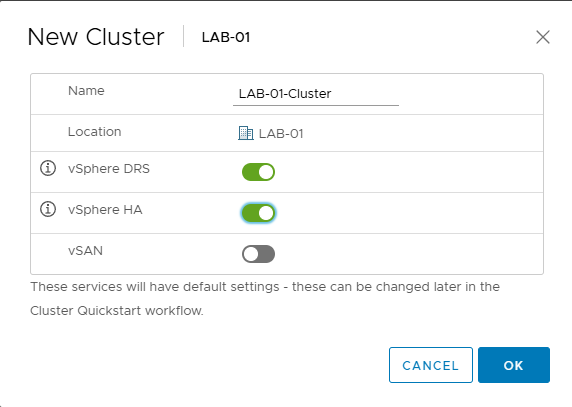
A Cluster allows you to pool the hardware resources of multiple physical hosts.
- Right-click your newly created Datacenter and select New Cluster.
- Provide a name for the cluster (e.g.,
LAB-01-Cluster). - Important: Ensure you enable both vSphere DRS and vSphere HA at this stage to allow for automated load balancing and high availability.
Step C: Add ESXi Hosts to the Cluster
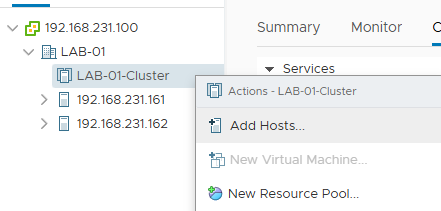
Bring physical compute power into your logical cluster.
- Right-click the Cluster and select Add Hosts.
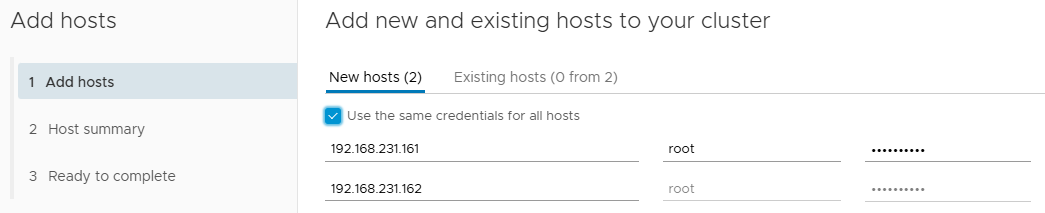
- Enter the IP addresses of your target ESXi hosts (e.g.,
192.168.231.161,192.168.231.162). - Check the box for "Use the same credentials for all hosts" if applicable, and enter your root credentials.
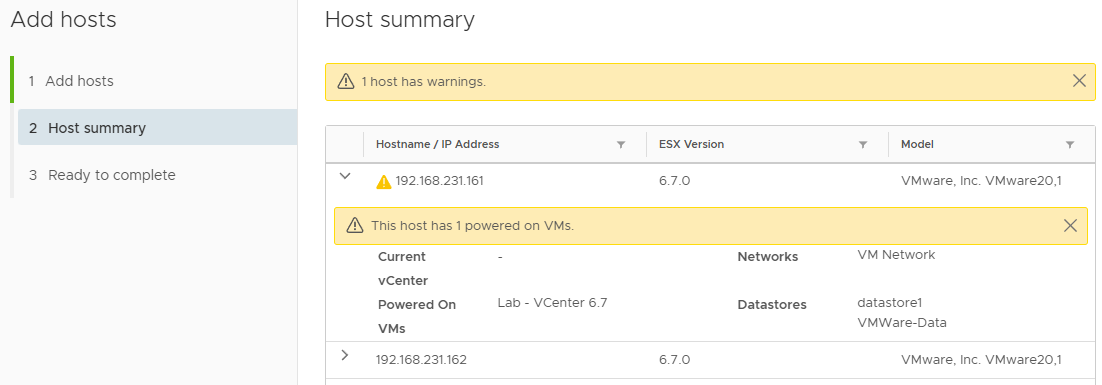

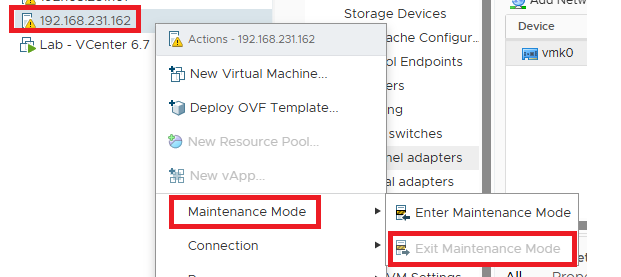
Prerequisite Check: After adding the servers, verify that the hosts are NOT in Maintenance Mode. If they are, right-click the host, select Maintenance Mode, and click Exit Maintenance Mode.
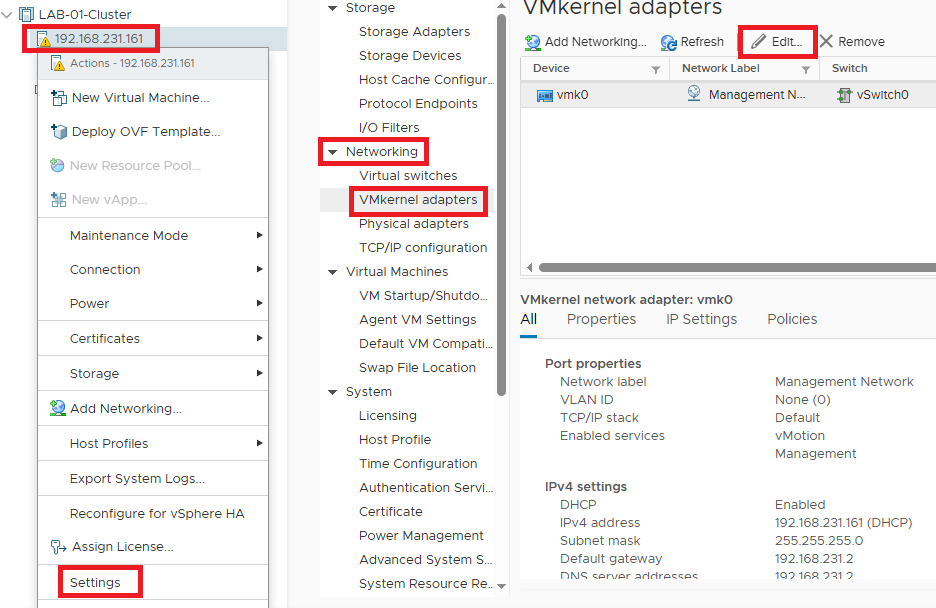
Network Configuration: Enabling vMotion on VMkernel
Enable the vMotion service on VMkernel adapters across all hosts to allow live migration.
For VMware live migration to function properly, the vMotion service must be enabled on the VMkernel adapters across ALL hosts in the cluster.
- Select your ESXi host, navigate to Configure > Networking > VMkernel adapters.
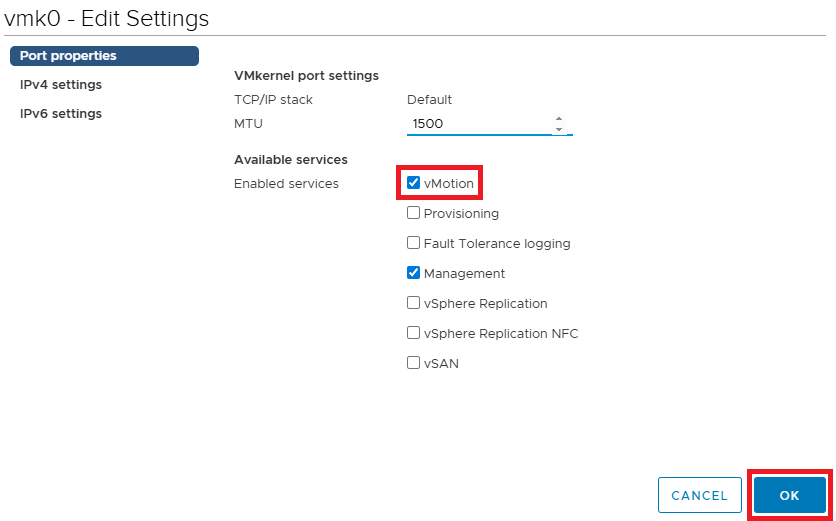
- Select the appropriate adapter (typically
vmk0) and click Edit. - Check the box for vMotion under the Enabled services section.
- Repeat this critical step for all hosts within the cluster.
Storage and Virtual Machine Preparation
Place virtual machines on shared storage and upload the required OS ISO to enable live migration.
Requirement: To successfully migrate live workloads, your virtual machines must reside on Shared Storage (such as iSCSI, NFS, or SAN), not on local host disks.
Upload ISO & Create the Virtual Machine
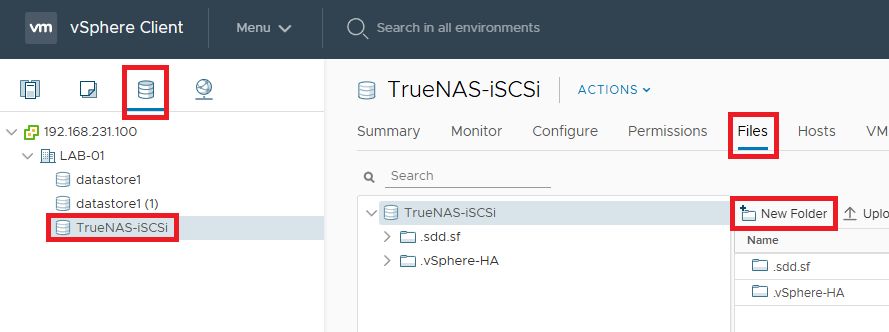
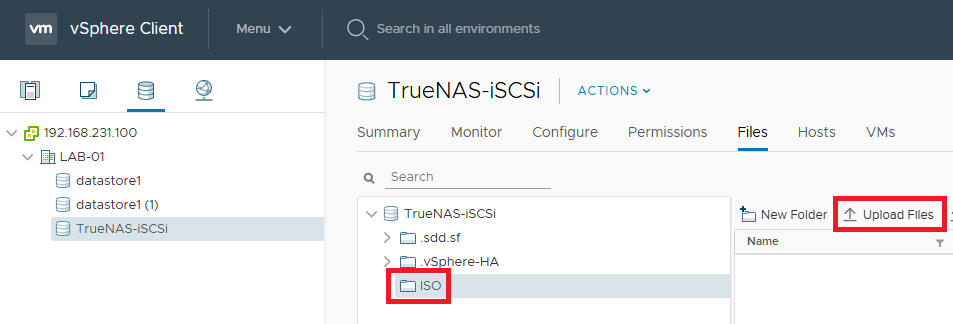
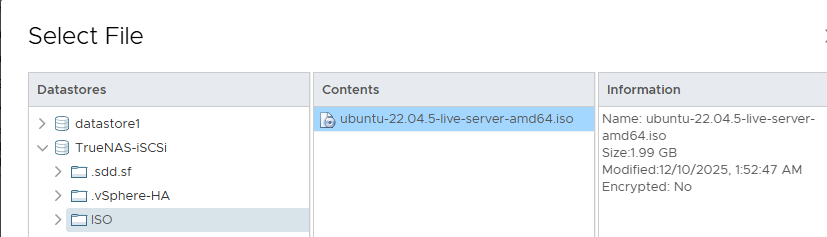
- Navigate to the Datastores tab and select your
configured Shared Storage (e.g.,
TrueNAS-iSCSI). - Go to the Files tab and upload your desired OS ISO (e.g., Ubuntu Server).
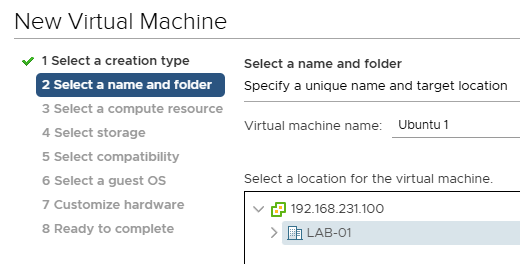
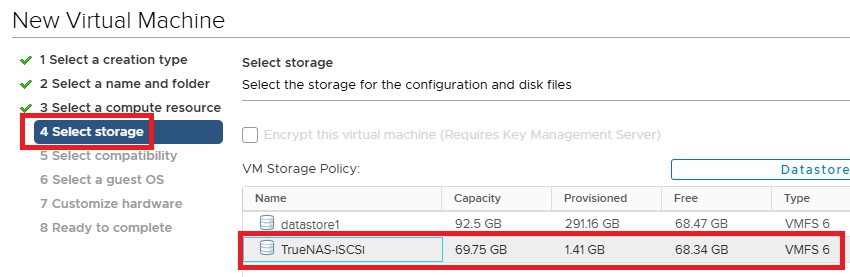
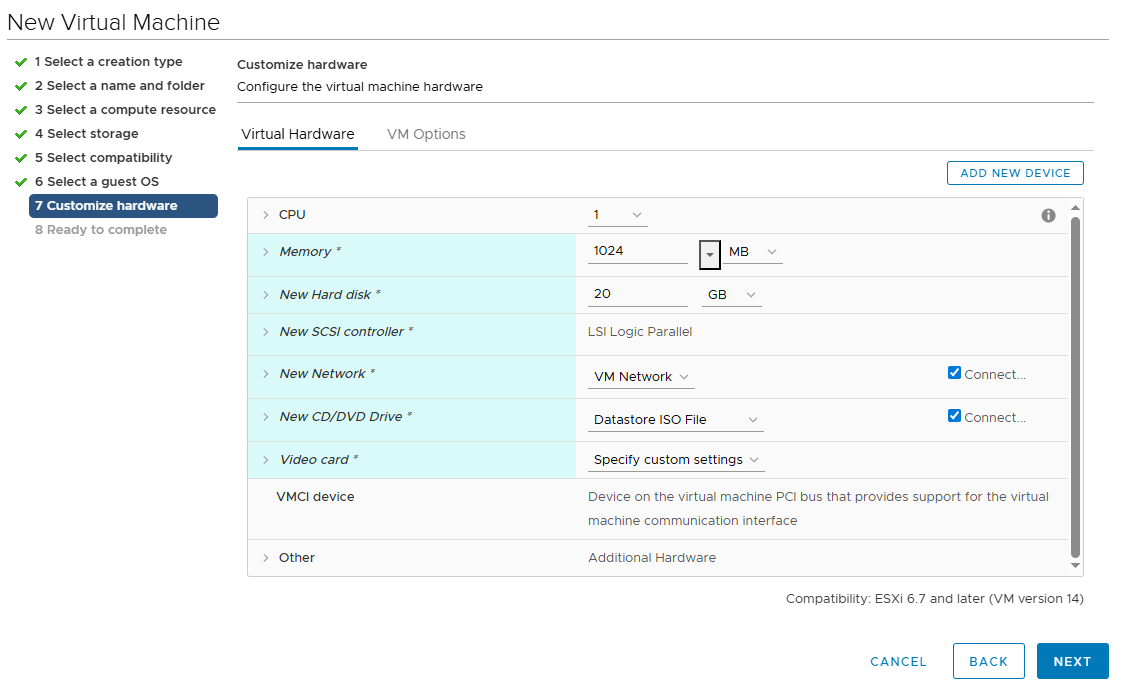
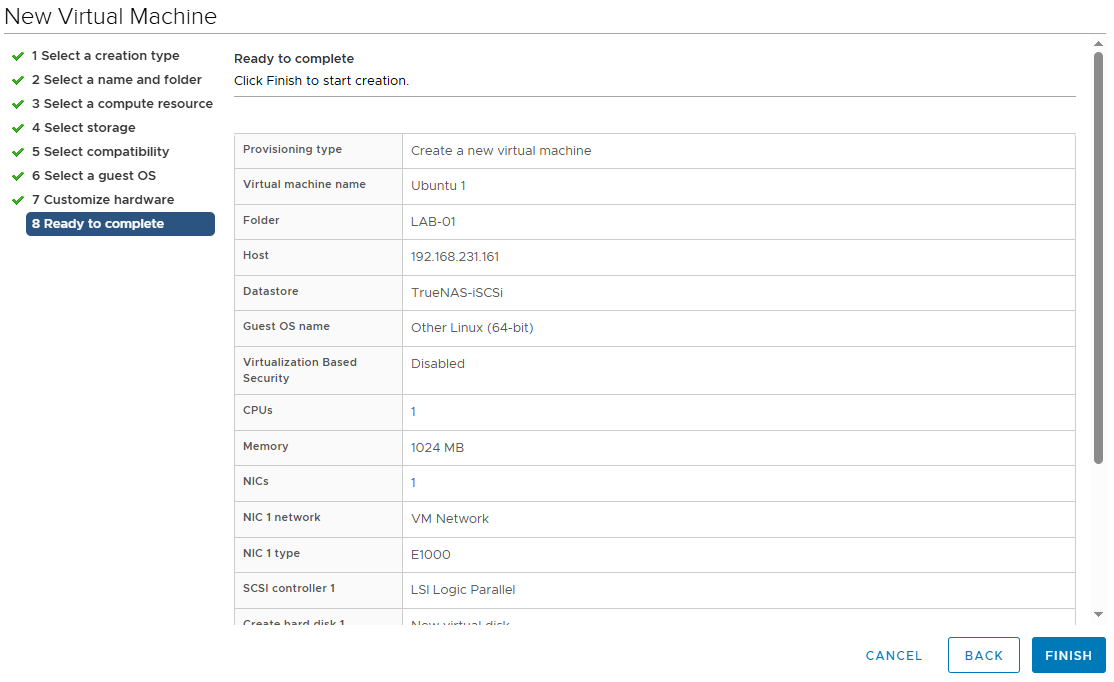
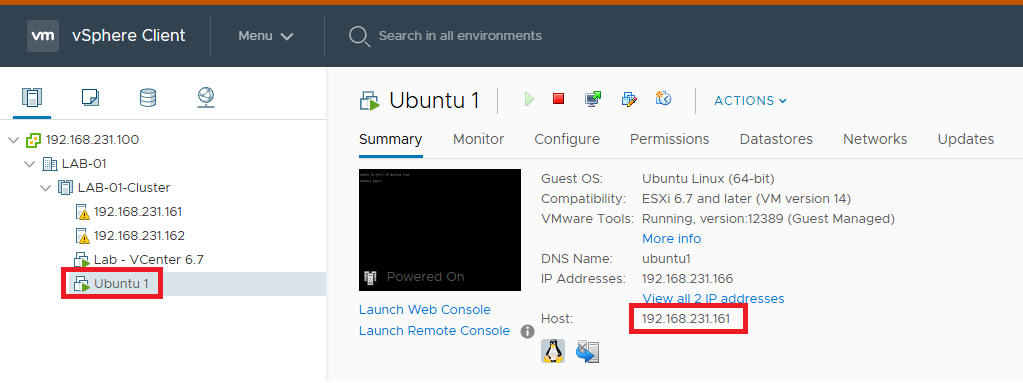
- Create a new VM on your primary ESXi host. Crucial: Ensure you select the shared storage location (e.g., TrueNAS) for the VM's files.


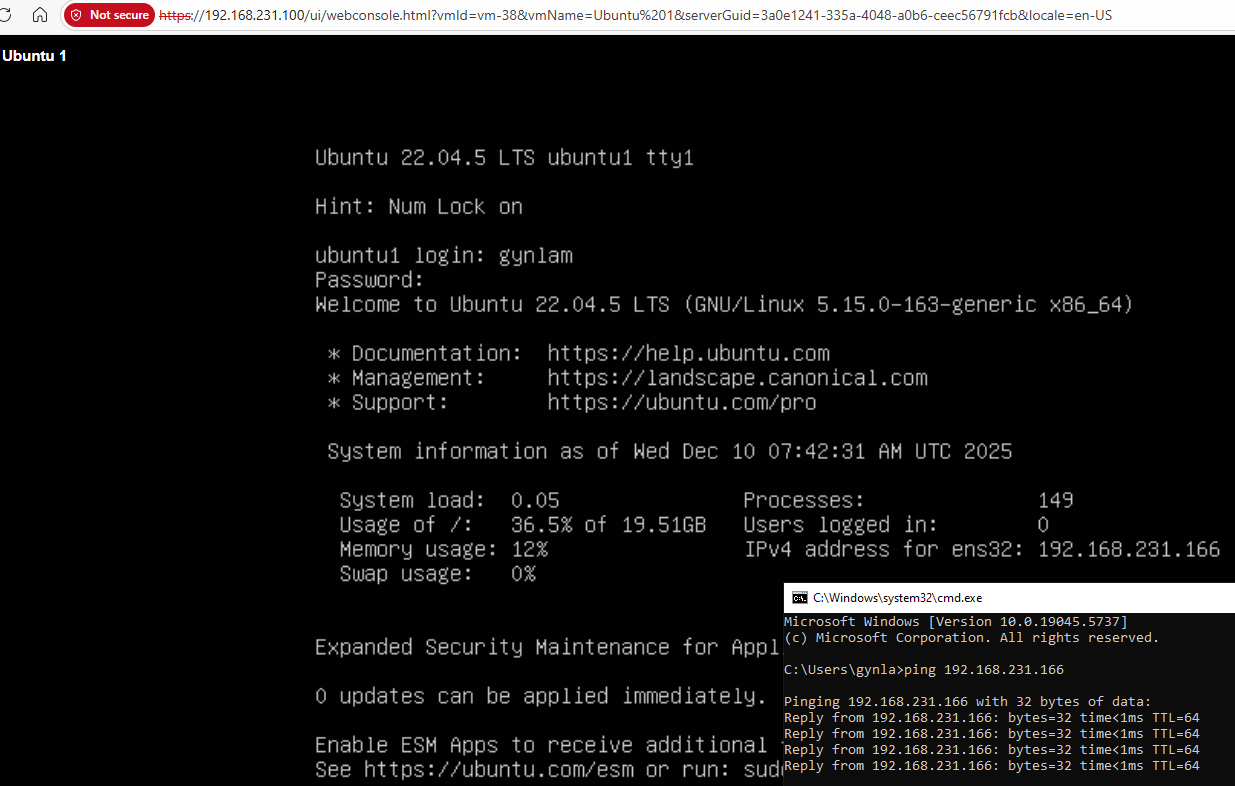
Scenario 1: Testing vMotion (Live Migration)
Seamlessly move a running virtual machine between hosts with zero application downtime.
Goal: Seamlessly move a running virtual machine from Host A to Host B with zero application downtime.
- Power on the Ubuntu VM, install the operating system, and log in.
- Open a terminal (or CMD on your local PC) and initiate a continuous
ping to monitor connectivity:
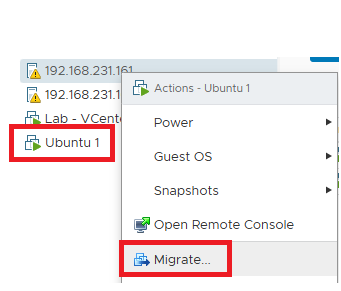
ping [VM-IP] -t. - In vCenter, right-click the target VM and select Migrate.
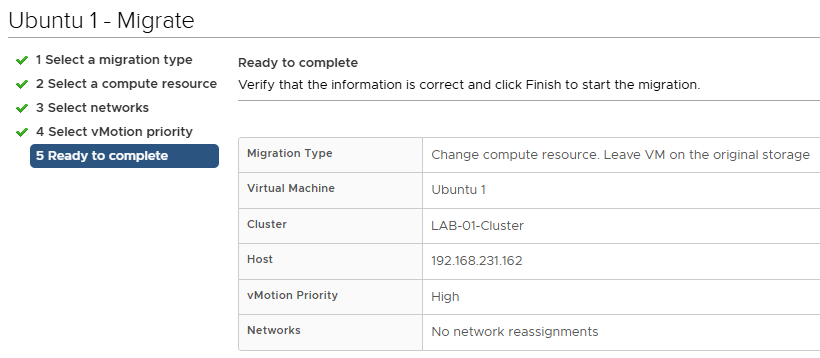
- Select Change compute resource only (since the underlying storage is already shared).
- Select the Destination Host (your secondary ESXi host).
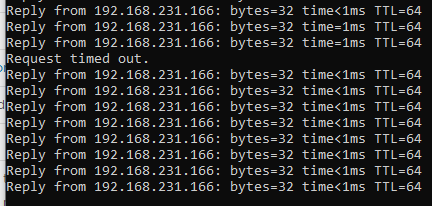
- Finish the wizard and observe the continuous ping results.
Result Analysis
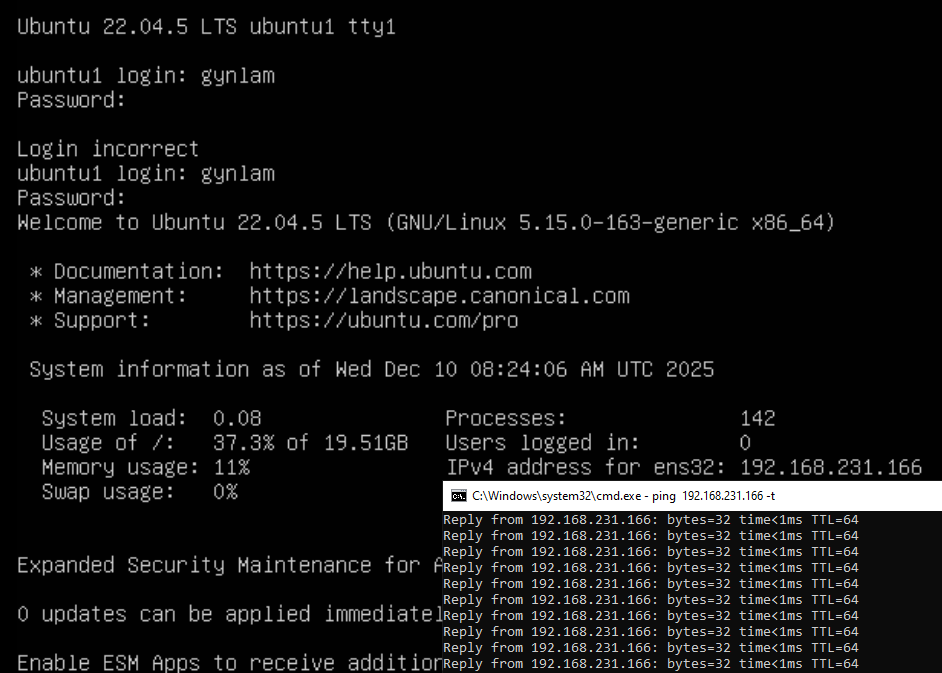
During the live migration, you should experience almost no packet loss (typically 0 or 1 dropped packet). The end-user experience remains completely uninterrupted.
Scenario 2: High Availability (HA) Failover Testing
Simulate a catastrophic server failure and observe how vCenter automatically restores VMs on surviving hosts.
Goal: Simulate a catastrophic physical server failure and observe how vCenter automatically restarts the affected VM on a surviving host.
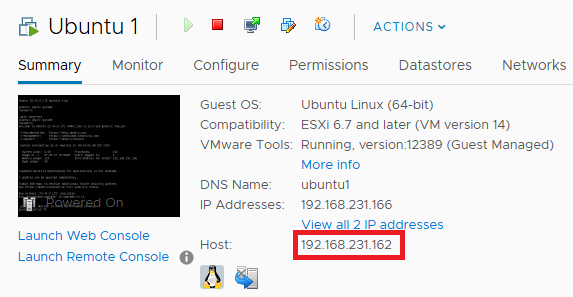
- Ensure the virtual machine is actively running on Host 2.
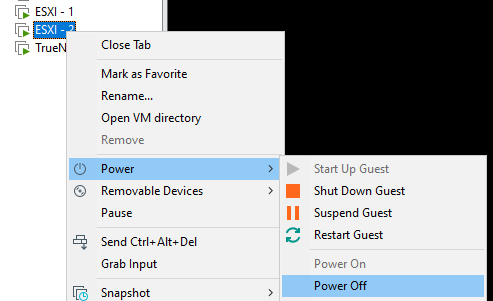
- Simulate Failure: Perform a hard power-off on Host 2 (via physical power button or baseboard management controller).
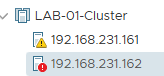
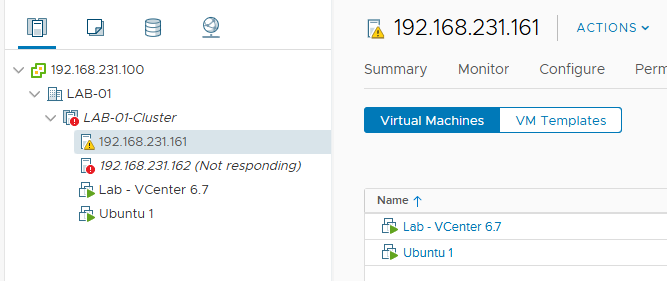
- Observe the vCenter console: Host 2 will eventually show a red alert stating Not Responding.
- The continuous ping will time out significantly. This is expected, as the VM has effectively crashed alongside the host.
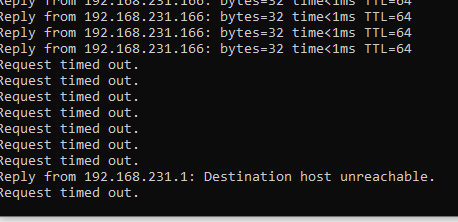
The HA Recovery Process
Within a few minutes, vSphere HA will detect the host failure. You can monitor the automated recovery in Monitor > Tasks and Events. Look for the system log: "vSphere HA restarted virtual machine..."


Note regarding the vCenter Server VM: If your vCenter Appliance was hosted on the crashed server, you might temporarily lose access to the web portal (showing a 503 Service Unavailable error). Be patient for 10-30 minutes while vSphere HA restarts the vCenter VM on a healthy host. You can monitor the boot status via VAMI (Port 5480).
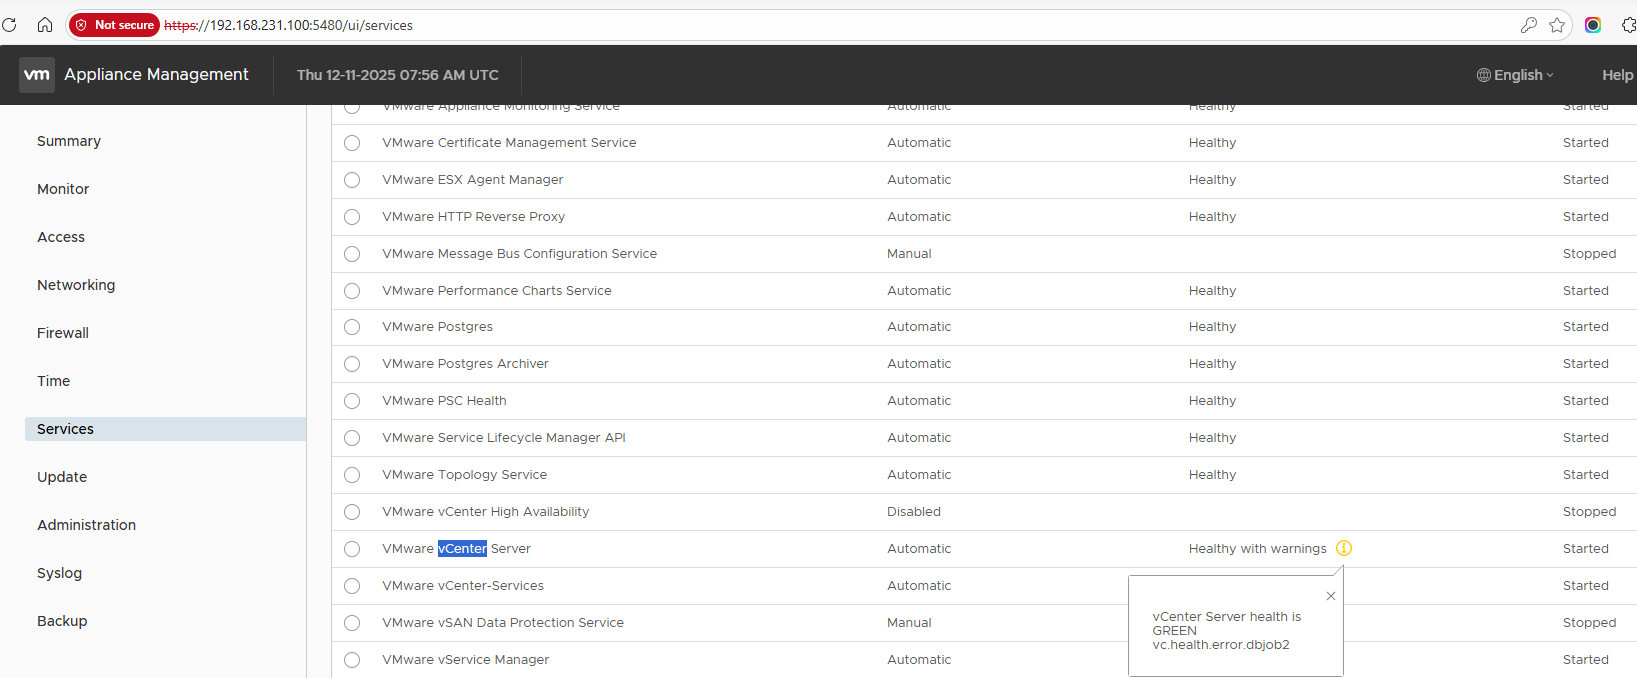
Conclusion: Once the HA process completes, both your application VM and vCenter will automatically be running securely on Host 1, preserving overall business continuity.
Get In Touch
Complex infrastructure challenges deserve elegant solutions. Let's realize it together.
gynlam328@gmail.com
Phone
+84-83314-1685
Location
Ban Co Ward - Previously known as District 3, HCMC