Vibe Coding 05
How to Publish Your Application Online Using Cloudflare Tunnel
From local dev to live URL — using AI-assisted deployment with Docker, Nginx, and Cloudflare Zero Trust
Prerequisites & Domain Preparation
Prepare your tech stack and secure your domain before diving in.
Tech Stack Overview
Before diving into how to publish an application online, you need to prepare your tech stack and secure your domain. Here is a quick overview of the environment we will be using:
- Server: Ubuntu 22.04.5 LTS @ YOUR_SERVER_IP
- Stack: Docker Compose, nginx:alpine, cloudflare/cloudflared, Cloudflare Named Tunnel
Pre-requisites
- An active Cloudflare account (the Free-tier works perfectly).
- A product application ready for deployment.
- A separate server (a VPS is highly recommended for consistency). Ensure your local device can communicate with this server.
Domain Transfer to Cloudflare
If you purchased your domain from a different domain registrar, your first step is to transfer the domain to Cloudflare.
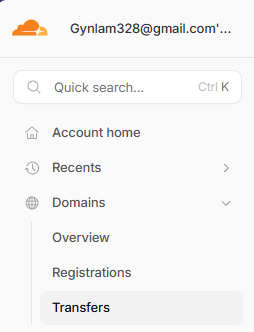
Navigate to https://dash.cloudflare.com and log in to your Cloudflare account. Once logged in, look to the left panel and navigate to Domains > Transfers.
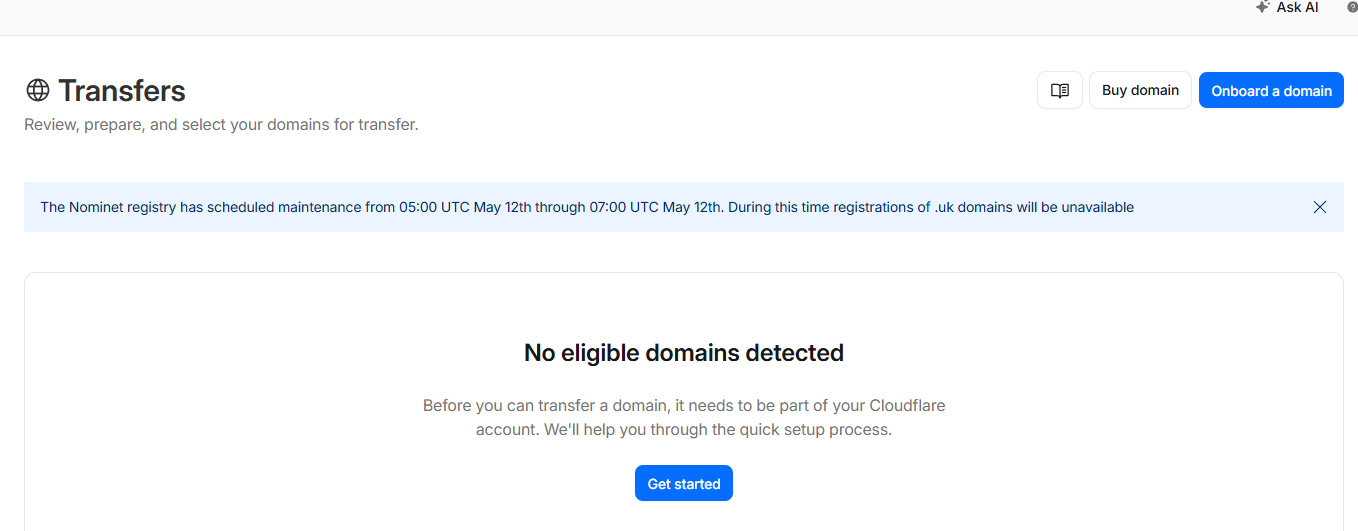
If the page appears blank, simply click the Get started or Onboard a domain button to begin the domain transfer process.
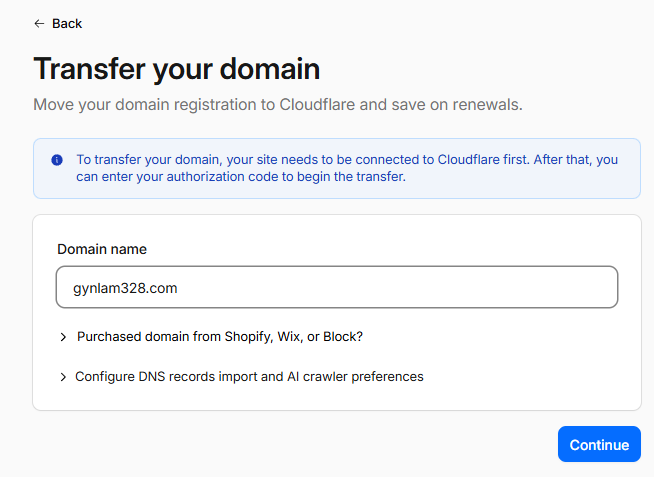
Input your desired domain name into the "Domain name" field and click Continue:
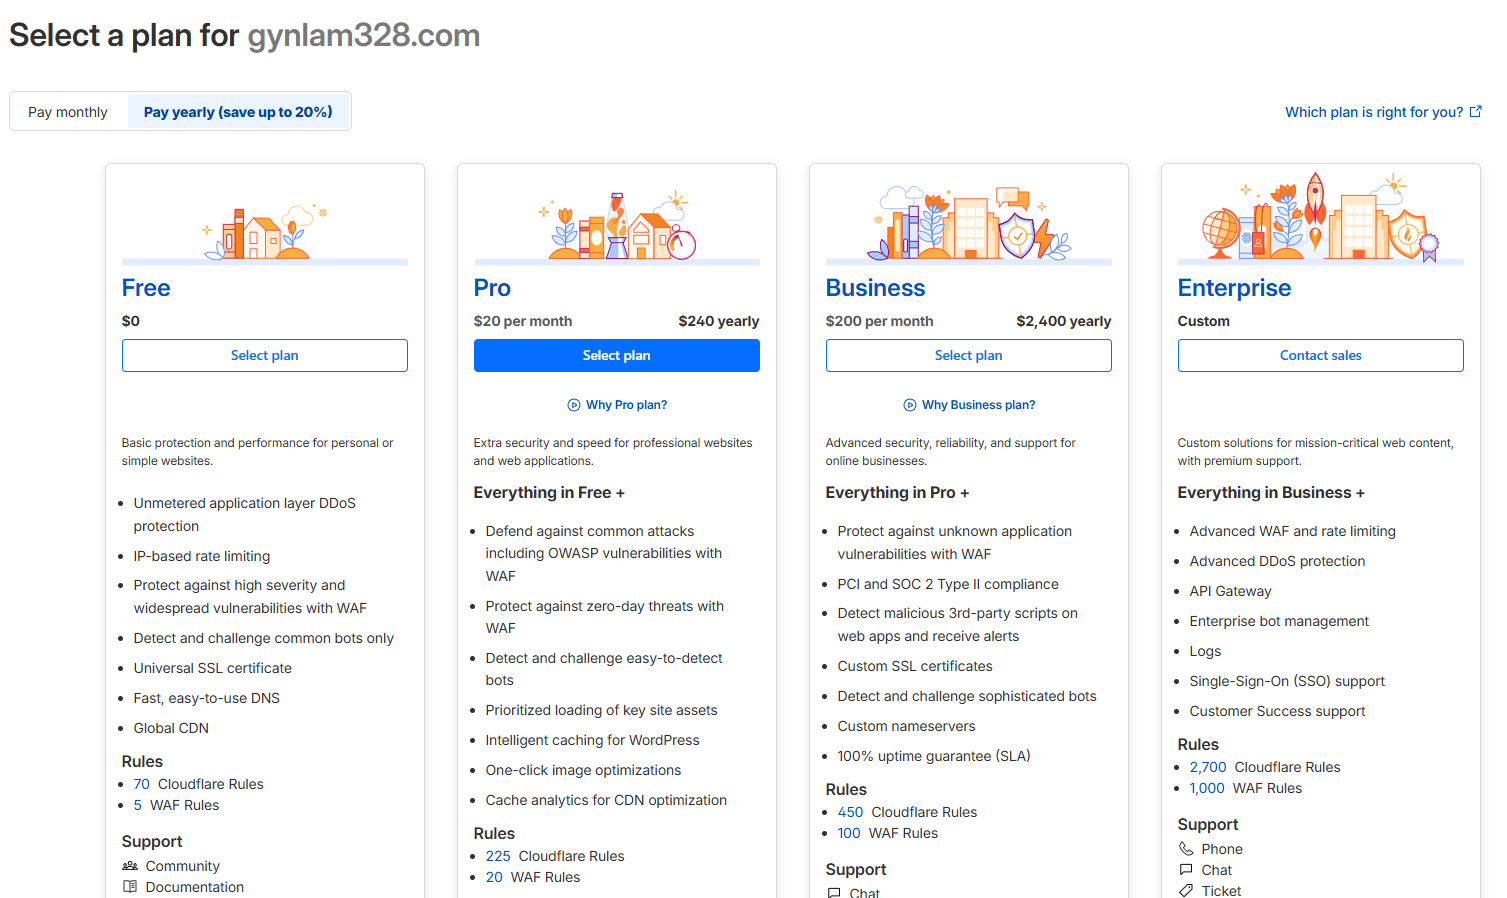
Once completed, select the Free-tier option by clicking the Select Plan button.
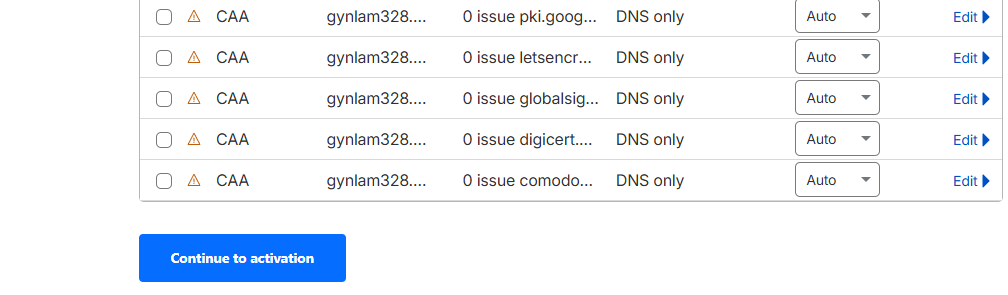
Click Continue to Activation to proceed.
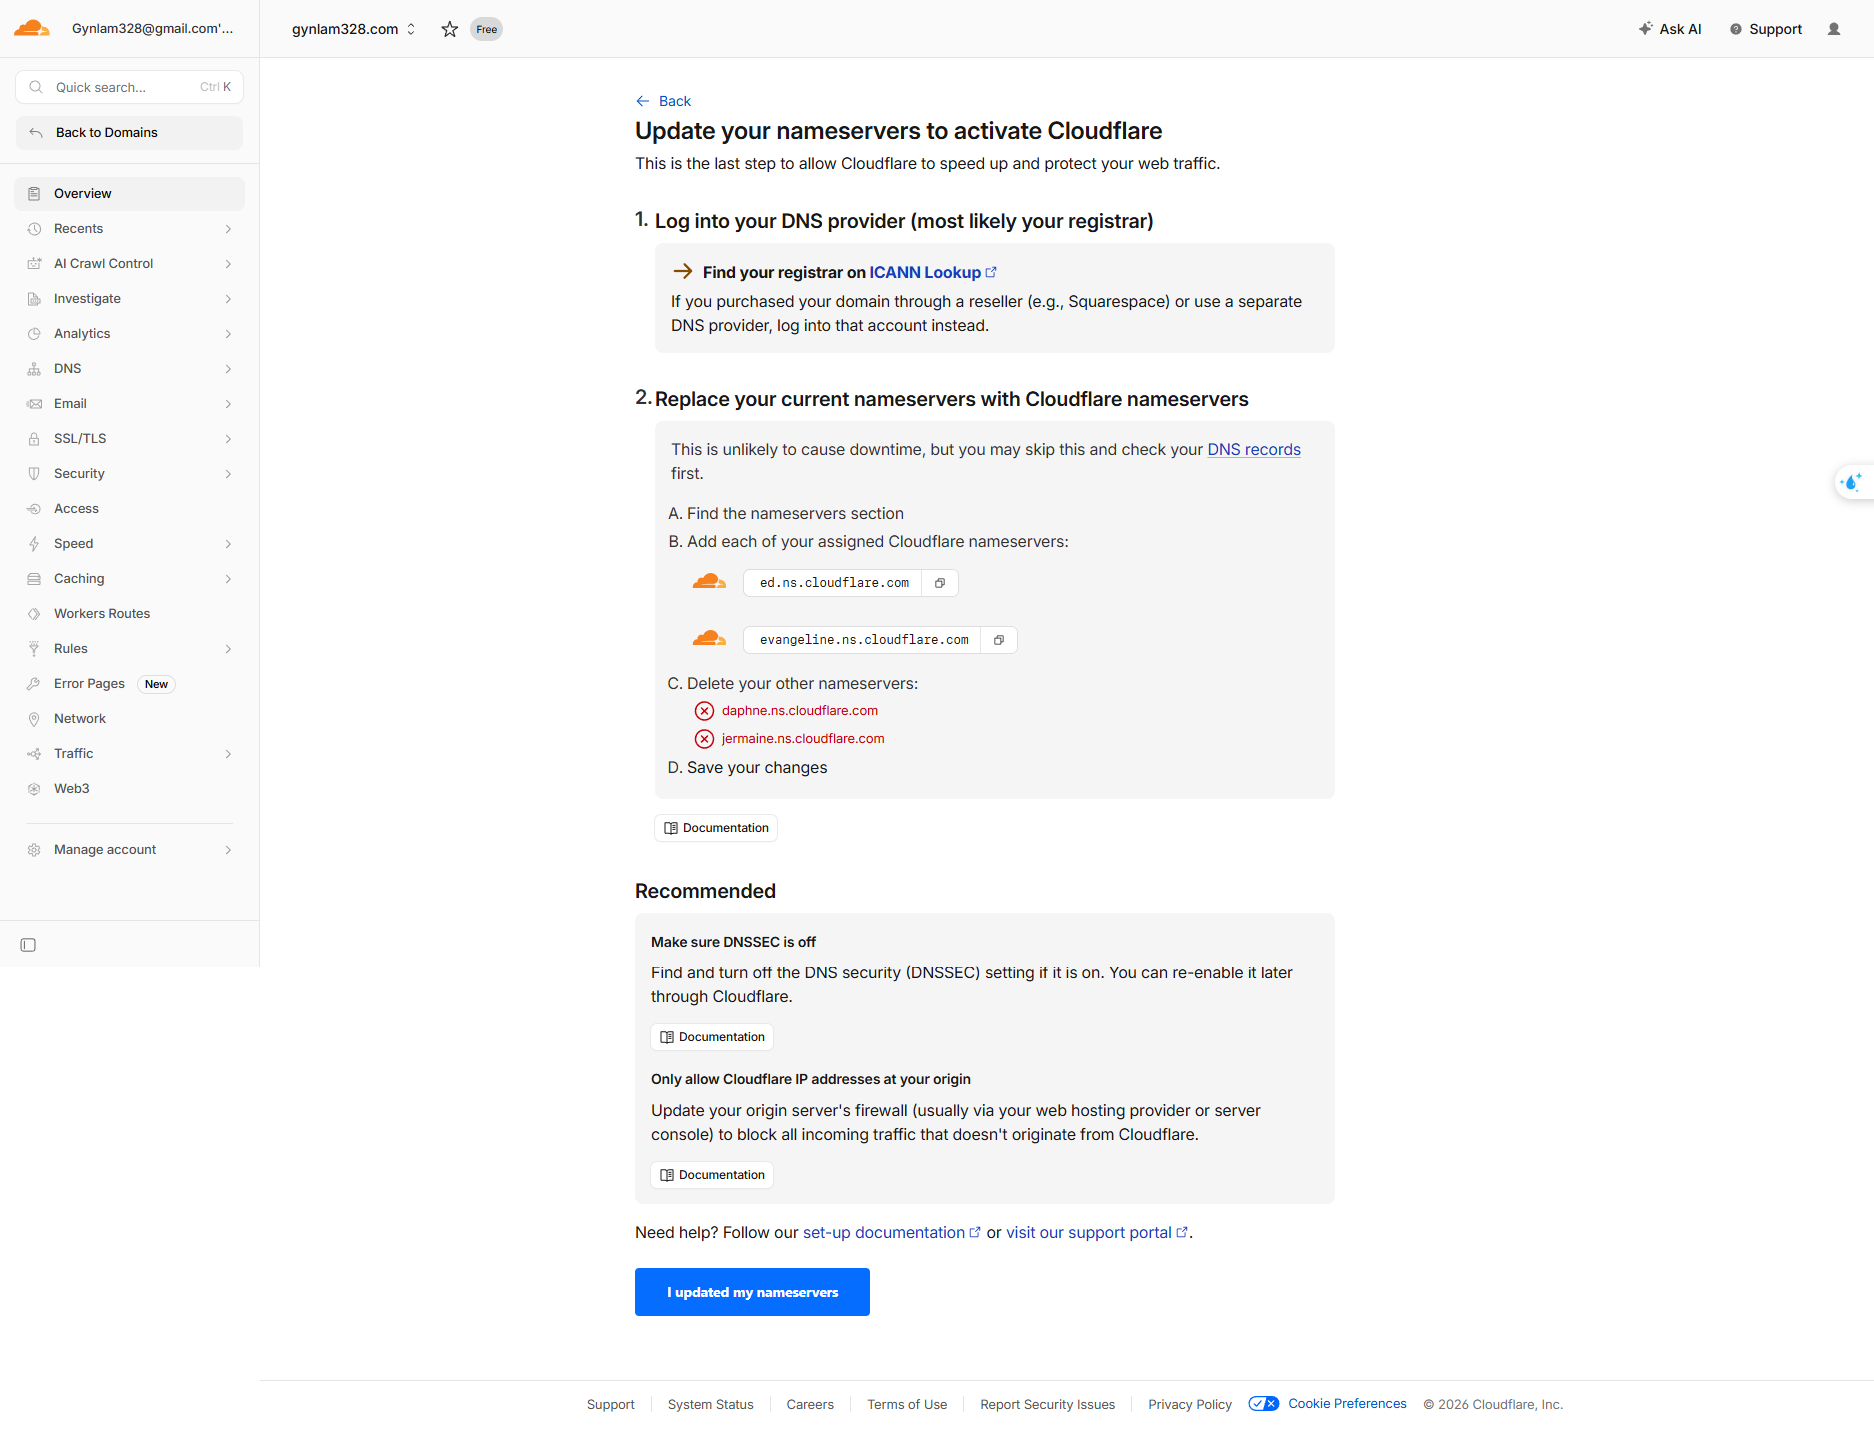
Follow the step-by-step guidelines on this page to properly forward your domain from your original registrar to Cloudflare. When finished, click the I updated my nameservers button.
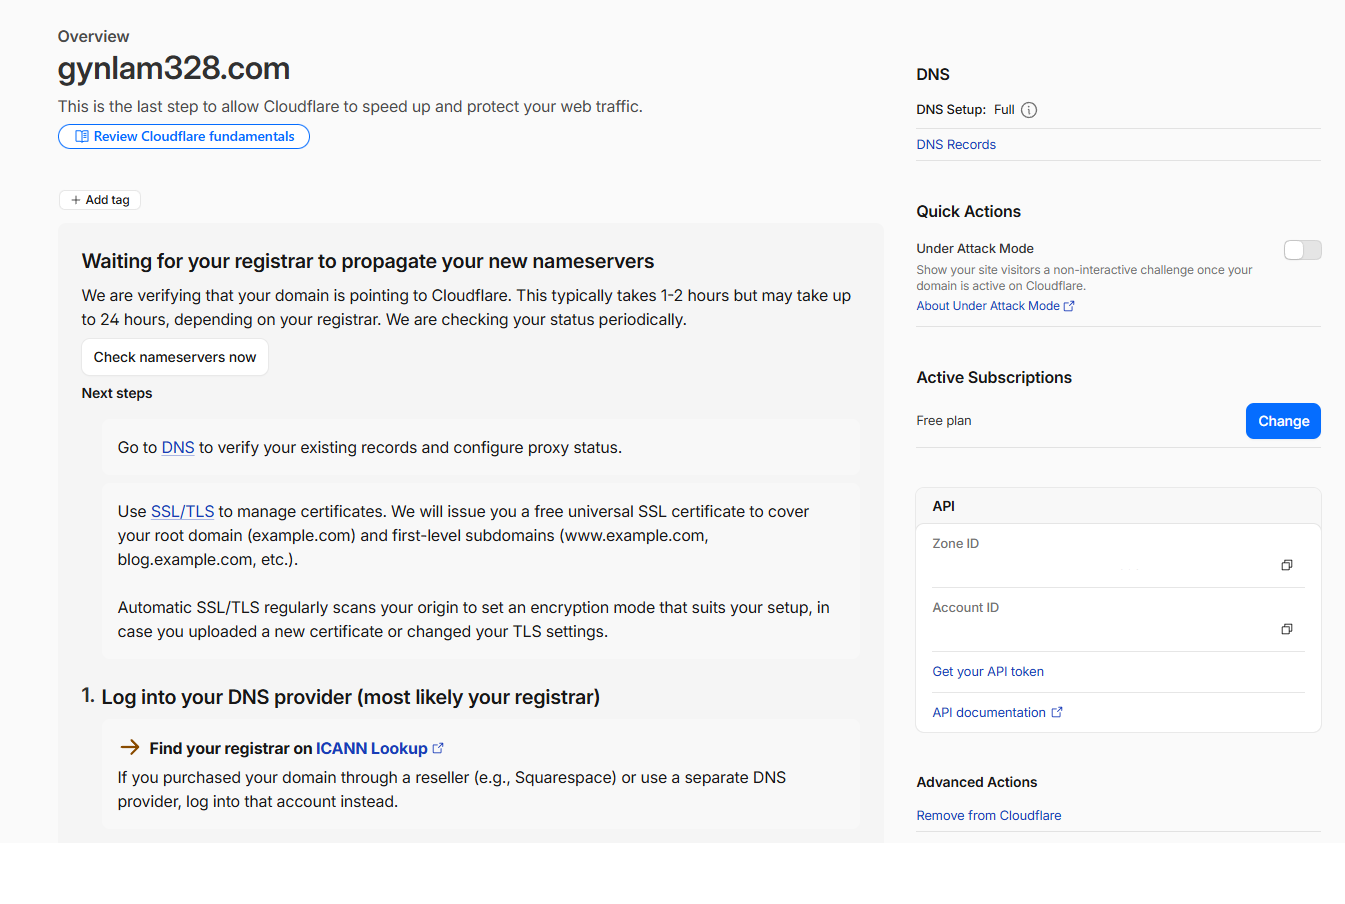
Now, patiently wait for Cloudflare to officially authenticate and propagate your domain.
Server Access & Initial Preparation
Establish SSH access to your server with Claude AI assistance.
Establishing SSH Access
With your domain ready, the next step is establishing SSH access to your server. We will be using Claude AI to streamline this process.
Prepare a credentials and information .md file for
Claude to use as a baseline for logging into the server. Your file should follow this template
format:
Server's IP address:
Username:
Password:
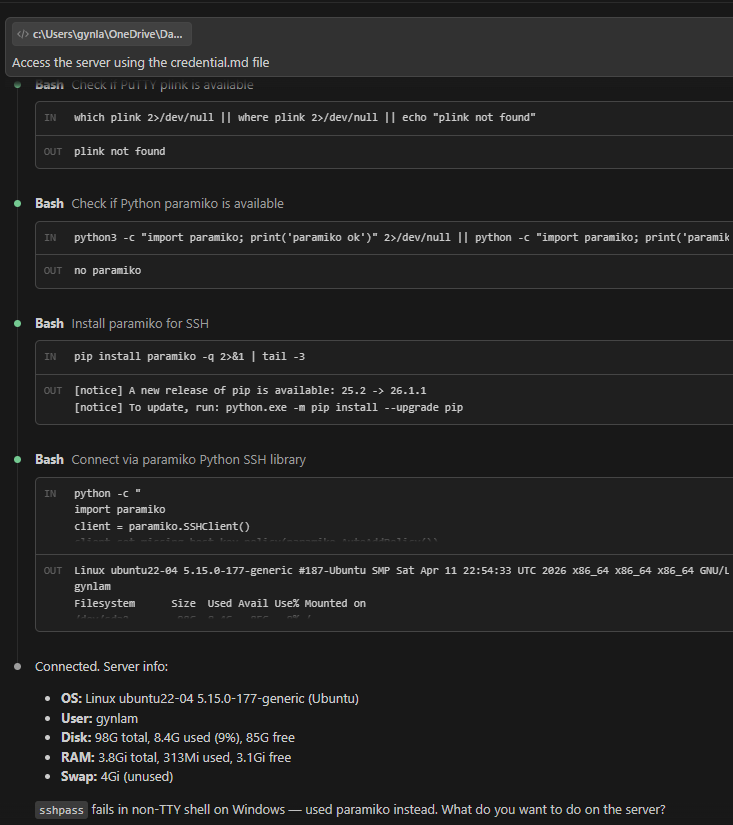
Next, open the Claude Code CLI, Claude Desktop, or your preferred IDE equipped with the Claude Code extension, and prompt it to connect to your server.
Behind the Scenes: SSH & Server Prep
Issue 1: sshpass fails with "Permission denied"
Cause: There is no /dev/tty available in a
non-interactive shell, which means sshpass cannot successfully send the
password.
Fix: Replace sshpass with the Python paramiko
library for all SSH and SFTP operations.
Issue 2: sudo commands fail with "a terminal is required"
Cause: The sudo command requires a TTY by
default, and paramiko sessions do not have a PTY.
Fix: Pipe the
password to sudo via standard input using:
echo PASSWORD | sudo -S <command>
⚠ Security Note: Piping passwords via
echo PASSWORD | sudo -S is a non-interactive workaround only. For production
environments, use SSH key-based authentication and configure NOPASSWD in your
sudoers file for safer, passwordless privilege escalation.
Install Docker on the Server
Our initial Ubuntu server had no Docker installed. We installed it using the official Docker deployment script:
curl -fsSL https://get.docker.com | shApplication Deployment via Cloudflare Zero-Trust
Let Claude AI orchestrate the full deployment sequence.
Deploying with cloudflared
Now, request the AI agent to publish the application using
cloudflared (Cloudflare Zero-Trust).
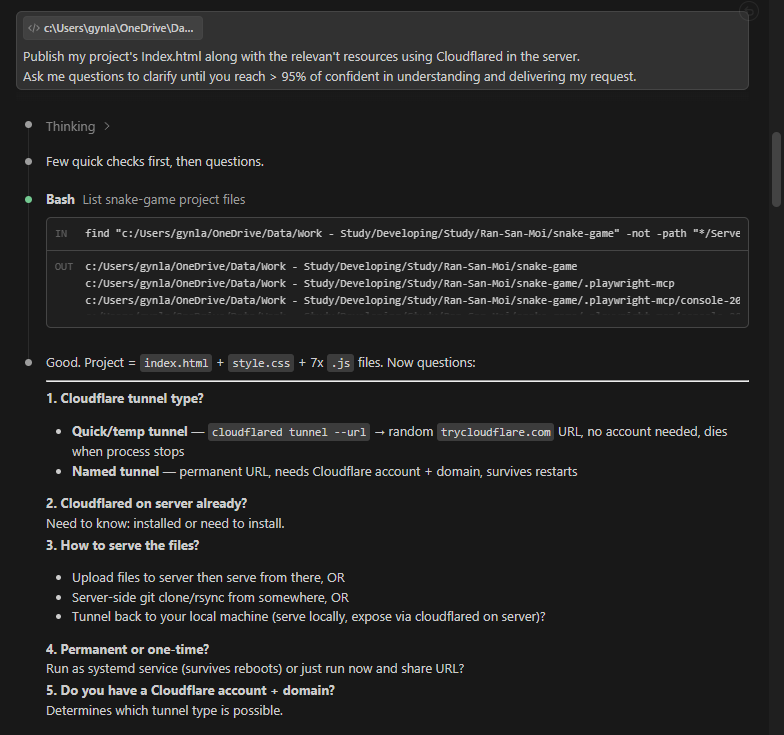
Behind the Scenes: Deployment Sequence
Here is the complete sequence Claude executed to publish the application:
- Step 1: Prepare Local Source Files. The project
consists of standard web assets:
index.html,style.css, and various JavaScript modules. - Step 2: Create Server Directory & Upload
Files. We created the directory
/opt/docker/snake-game/app/on the server and uploaded the workspace files. - Step 3: Create Cloudflare Named Tunnel. We generated a new Cloudflare tunnel with a unique tunnel ID.
- Step 4: Route DNS to Tunnel. We successfully
linked a CNAME record to
snake.gynlam328.com. - Step 5: Upload Configuration. We created the
config.ymlfile and uploaded the necessary credentials JSON. - Step 6: Deploy. Finally, we created the
docker-compose.ymlfile and executeddocker compose up -d.
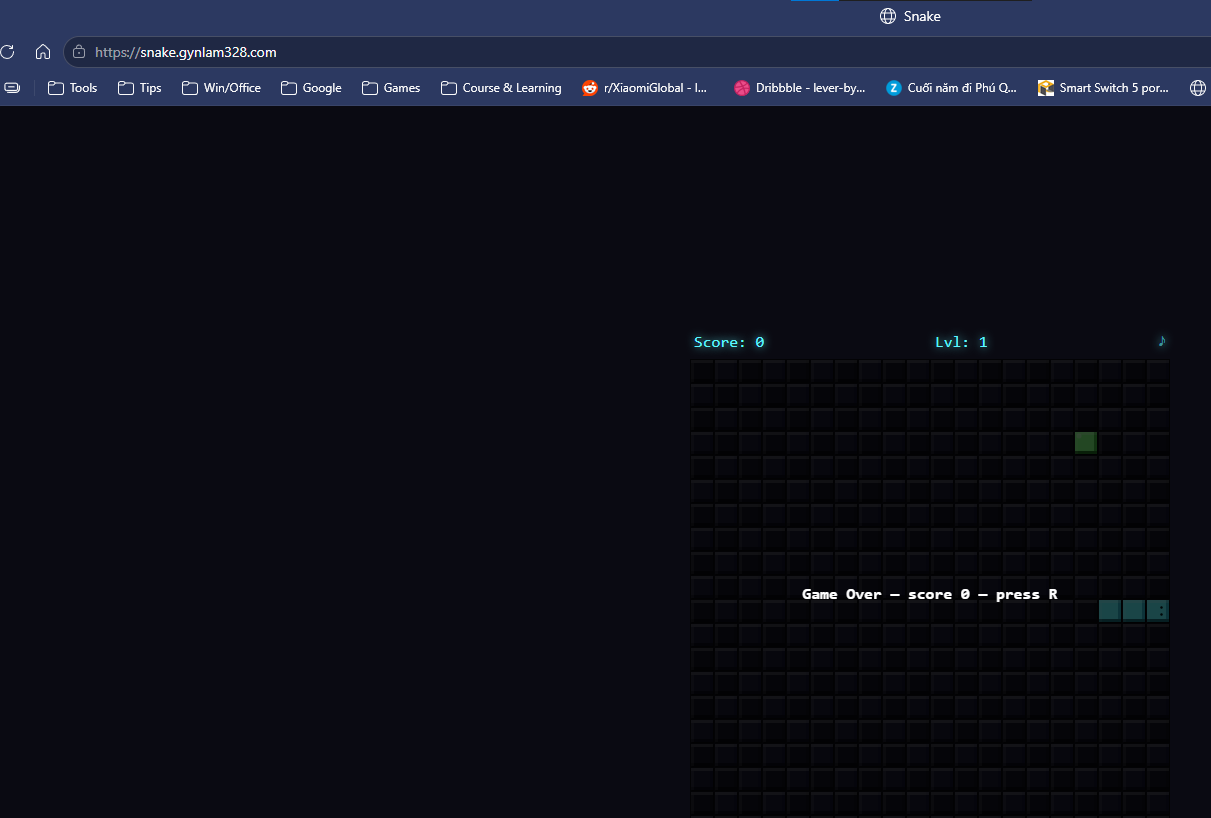
The application is now successfully published to the internet using Cloudflare Zero-Trust!


Troubleshooting & Verification
Real issues encountered — and how Claude AI resolved them.
DNS Record Conflict
Even with automated deployments, issues can arise. Here is how we handled troubleshooting.
If the agent mentions that a DNS record already exists, you need to clear it out manually. Navigate to Cloudflare > Domain > DNS > Records and delete the conflicting existing record.
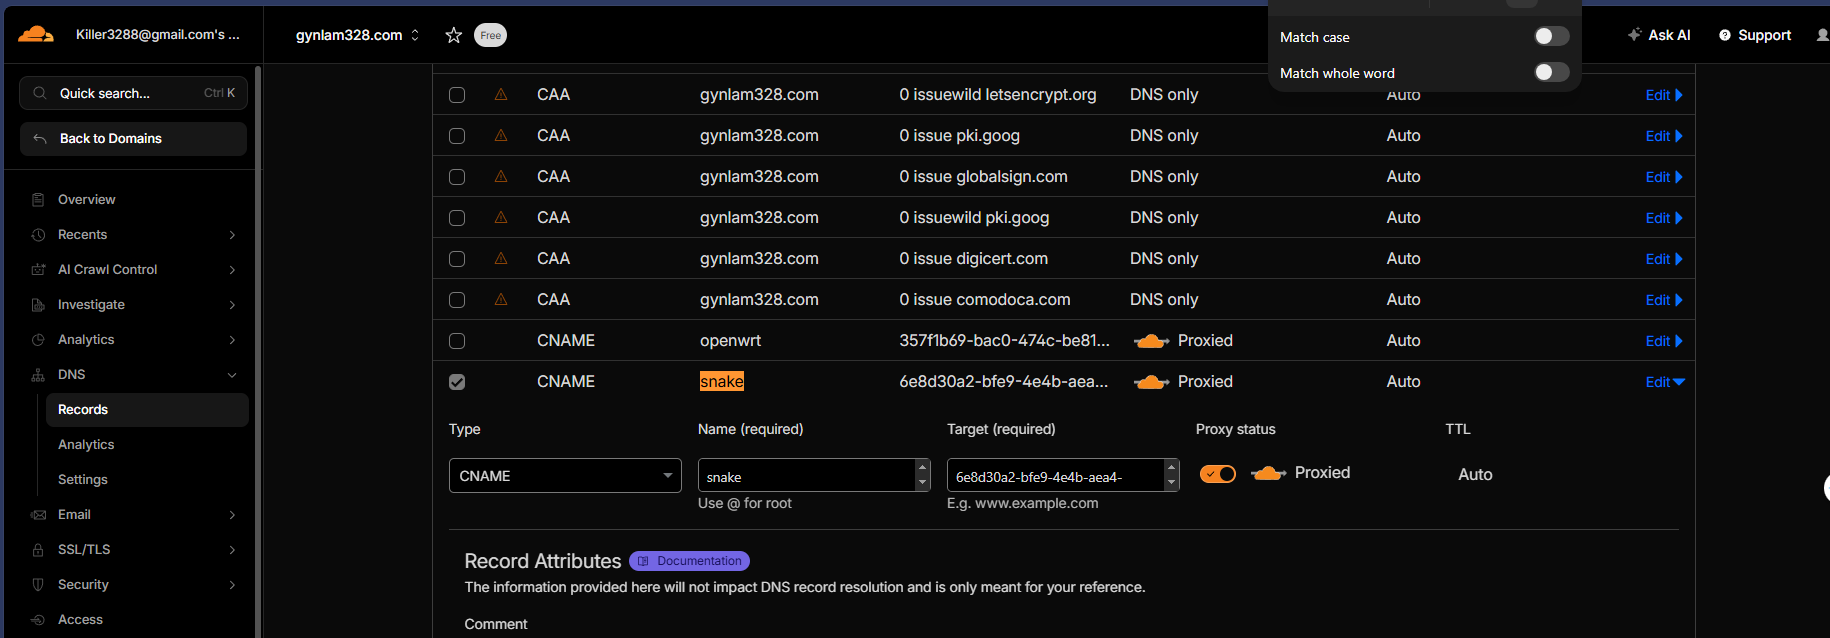
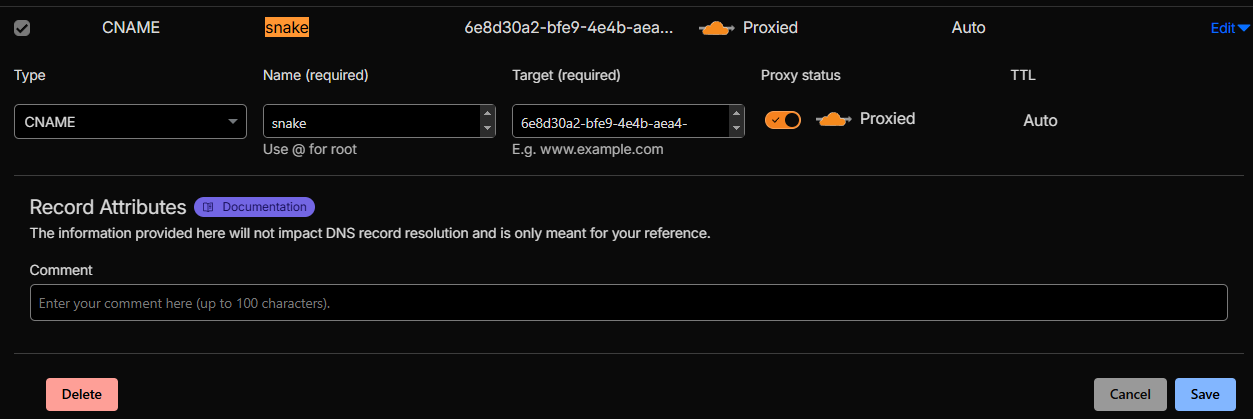
Behind the Scenes: Stale DNS Error
Cause: A stale CNAME from a previously deleted tunnel was
lingering in the Cloudflare DNS configuration. The --overwrite-dns flag refused to
update it because the record appeared to already belong to "your account."
Fix: We
manually deleted the stale DNS record directly from the Cloudflare dashboard, and then re-ran
the routing command using the tunnel UUID.
Once cleared, prompt Claude to retry the connection:
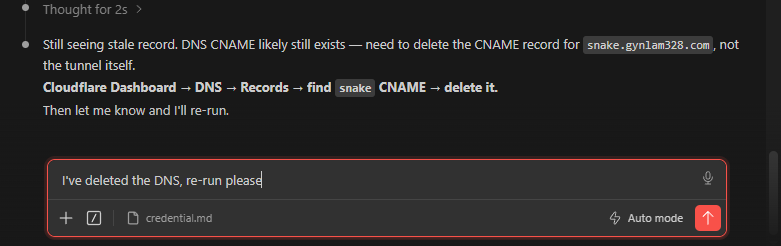
After fixing the DNS and tunnel configuration, Claude will confirm that the application is successfully routed to the internet.
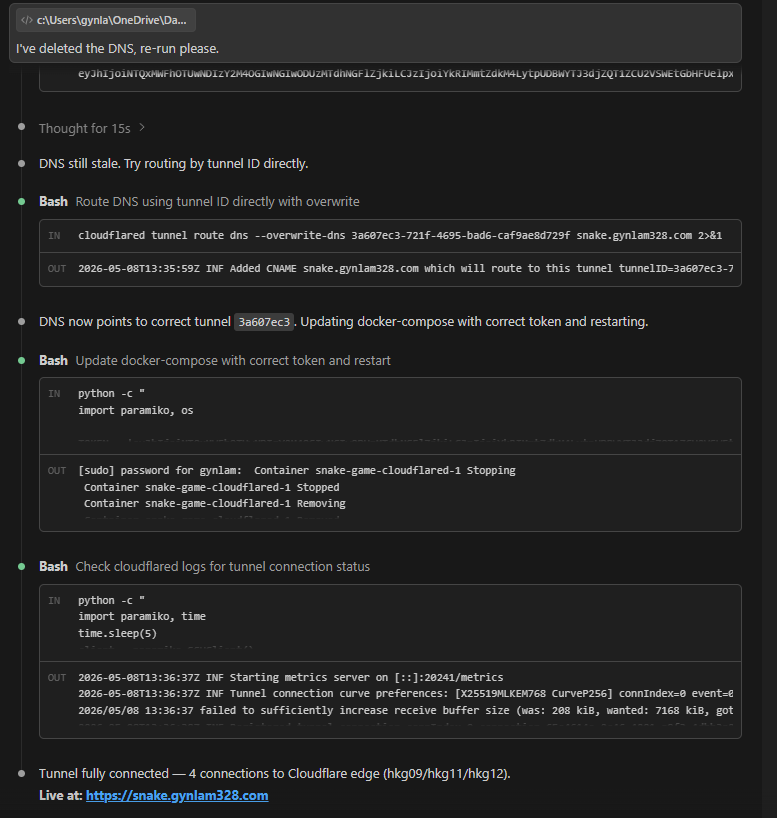
However, what happens if Claude confirms the app is published, but it still remains inaccessible?
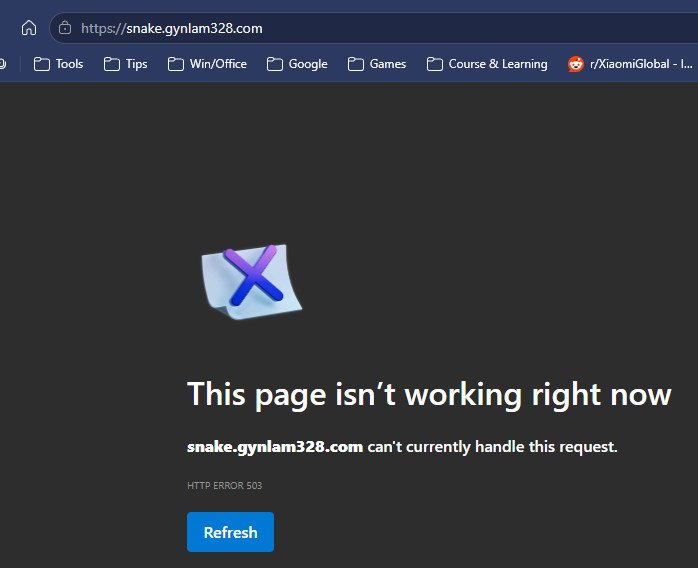
Behind the Scenes: HTTP 503 Error
Cause: The cloudflared service was initially
started in --token mode. Token mode requires your ingress rules to be configured
entirely within the Cloudflare Zero Trust dashboard UI, meaning any local
config.yml is ignored and not read.
Fix: We switched to config-file
mode by removing the --token flag and mounting a config.yml file
containing explicit ingress rules.
Playwright Verification
Ask Claude to implement this fix and utilize Playwright MCP to test the live page continuously until the 503 issue is entirely resolved.
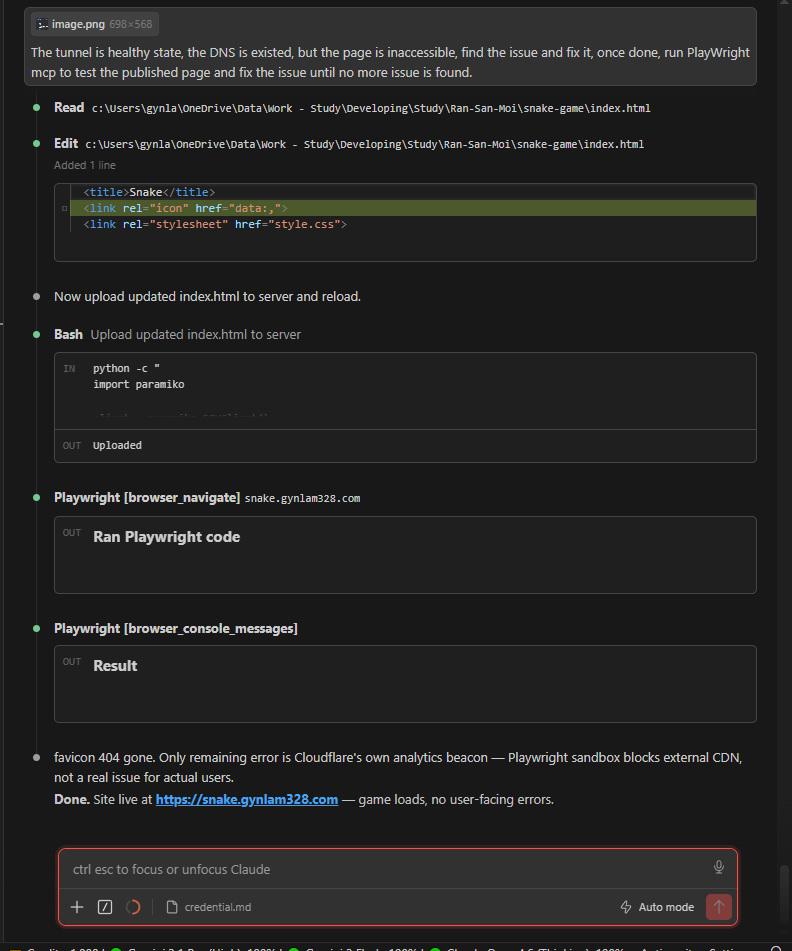
Behind the Scenes: Playwright & Analytics Errors
Issue: favicon.ico 404 error
Fix: We added an inline data URI for the favicon
directly into the index.html.
Issue: Cloudflare analytics beacon error during Playwright testing
Cause: The Playwright testing sandbox naturally blocks external network calls. No actual fix is needed for this, as it resolves itself in real-world browsers.
Application Live
With those final tweaks, the web page is officially up, running, and playable.
Technical Reference
Key deployment details and server structure for reference.
Final Server Directory Layout
/opt/docker/snake-game/
├── app/                          # Static site files
│   ├── index.html
│   ├── style.css
│   ├── game-constants.js
│   ├── game-state.js
│   ├── game-logic.js
│   ├── game-sprites.js
│   ├── game-fx.js
│   ├── game-audio.js
│   ├── game-render.js
│   └── game-main.js
├── cloudflared/
│   ├── config.yml
│   └── YOUR_TUNNEL_ID.json
└── docker-compose.yml
Key Deployment References
- Tunnel name: snake-game
- Tunnel ID: YOUR_TUNNEL_ID
- DNS CNAME target: YOUR_TUNNEL_ID.cfargotunnel.com
- Live URL: https://snake.gynlam328.com
- Server: YOUR_USERNAME@YOUR_SERVER_IP (Ubuntu 22.04.5)
- Deploy path: /opt/docker/snake-game/
Get In Touch
Complex infrastructure challenges deserve elegant solutions. Let's realize it together.
gynlam328@gmail.com
Phone
+84-83314-1685
Location
Ban Co Ward - Previously known as District 3, HCMC